
Quilting to the Edge
March 8, 2020

Hi!
In our new March issue, regular Premium Online Quilt Magazine columnist Leah Day (www.leahday.com ) took a look at the question of how do you manage to free motion quilt to the edge of your quilts. She has some great points well worth sharing:
How do you get up close to the edge of the quilt and still control the stitching?
This is a really good question because the edges of your quilts are potential minefields of issues. You might be quilting along just fine in the middle of a quilt, but get right on the edge and suddenly your design will go out the window along with stitch quality as the edges shift and wiggle under your hands.
But this is NORMAL!
You’re on the edge of your quilt so you should have a few inches of batting and backing fabric under your hands, but the quilt will end and stabilization of all 3 layers stacked together ends with it.
So here’s a few solutions. There are probably hundreds of ways to circumvent or fix this issue, but we’ll start with just 2:
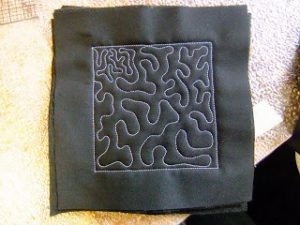
1. Don’t quilt to the edges – Just don’t do it. Add an extra 2 inch strip of fabric all around your quilt and mark a line right through the middle of it. Quilt to that line leaving 1 inch of fabric between you and the raw edge of the quilt at all times.
As you can see from my fabric samples of designs, this is how I quilted each 4 inch square – within a 6 inch quilt sandwich so I always had 1 inch of fabric all around the edges.
This extra inch of fabric gives you the added stabilization you will need. All three layers stay together beautifully and there’s hardly any issues of the design going crazy because the quilt remains stable.
2. Cut wider borders – This is basically the same answer as #1, but an alternative method. Instead of adding an extra 2 inch strip to your quilt, which most quilters simply won’t want to do, you can instead simply cut your borders 1 inch wider.
Again, mark 1 inch inside the edge of the quilt top and take your stitching to the LINE, not to the edges of your quilt.
This is my favorite solution because I can’t count the number of times I’ve quilted my free motion foot over and under and INTO my quilt top. I can’t count the number of times I’ve gotten so stuck on a quilt edge I had to break thread, usually ready to tear my hair out the whole time.
It’s annoying and frustrating and just not necessary. Make your life easier and less complicated by NOT quilting to the edges of your quilts.
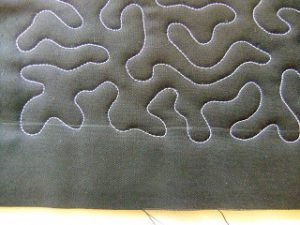
Note to Extra Stubborn Quilters: if you absolutely, positively, MUST quilt to the edges of a particular quilt top, use your hands to really flatten out the space you’re stitching, then quilt OVER the edge of your quilt top into the batting.
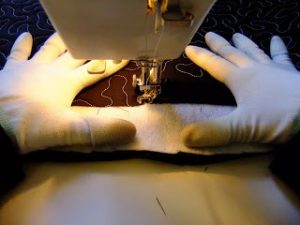
This area will be cut off when you apply your binding, but your design will remain more consistent and you should be able to maintain more control, but only if you really FLATTEN everything with your hands.
I work from right to left, always smoothing the quilt out, flattening out the edge so it’s squished down and not flipping up for my foot to catch on. Then I carefully stitch over the edge and into the batting, then back over the quilt, keeping the design simple, but consistent.
Leah Day
About the Author: Leah Day is the author of the Free Motion Quilting Project, a blog project dedicated to creating new free motion quilting designs each week and sharing them all for FREE!
Leah is also the author of From Daisy to Paisley – 50 Beginner Free Motion Quilting Designs, a spiral bound book featuring 50 designs from the project, and she now has three Free Motion Quilting classes available through Bluprint.com . www.daystyledesigns.com

Welcome to our
Online Quilt Magazine Blog
Read through to discover hints and tips, articles from magazine contributors, sneak peeks and more!
Please enter your email address in the box below to receive notification of
new posts by email.
Leave a Reply