
Stitched Christmas Cards!!
November 16, 2022

Hi!
I’m properly on a roll for Christmas now, and I keep thinking of more things I want to make and try. I spent the morning playing around with making some machine sewn stitched Christmas cards, and not only is this technique fun, but it’s actually really easy too.
Have you thought about sewing your own Christmas Cards this year? Save money, get creative, and use your own sewing machine to create unique cards with “Wow” for your friends and family.
Making my own cards like this seems to satisfy my creative urge, and it’s a good ‘quick fix’, and I just used up scraps I had lying around. What I like best though, is that these cards are definitely one-of-a-kind, and didn’t cost me $10+ or whatever a fancy store-bought card is these days.

Stitched Christmas Cards
You Will Need:
Some cardstock for your cards. You will find this anywhere you can buy scrapbooking supplies, or do as we did and pick up a few packs of blank cards from your local Dollar Store. (10 pack for $2)
Assorted paper or fabric scraps to embellish your cards with.
To Make:
I made three different types of stitched Christmas cards, just to see how they turned out.
This is actually really quick and easy, and I will be making more of these cards. Best of all – it’s just a technique to try – what you do with it, or how you make your cards is up to you!
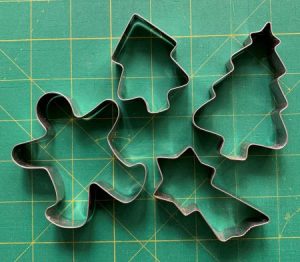
For my first card, I raided the kitchen and found a bunch of cookie cutters to use for templates.
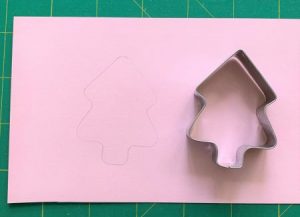
I traced on the wrong side of some leftover scrapbooking paper. (This weight of paper is ideal – it’s not too heavy, and not so light that it’s going to tear.)
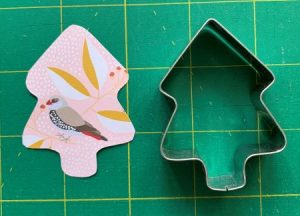
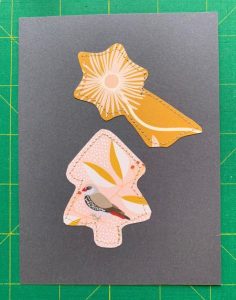
Ta dah! One Christmas tree – with a partridge in it???
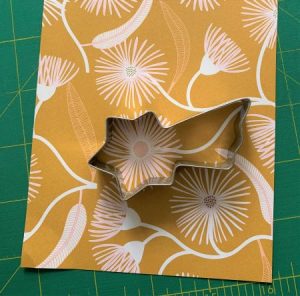
I quite liked this floral paper for this star – It just lent itself to fussy cutting…
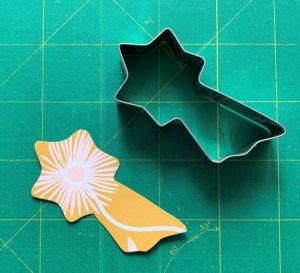
And voila! Looks like a star to me!

Like I said – this is more about technique, rather than perfection, so I popped them on a darker paper background.
I did use a spot of glue on the backs just to keep them where I wanted them before I sewed them down.
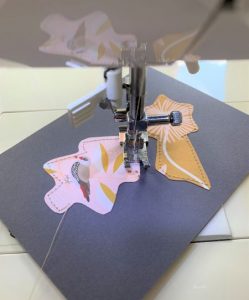
And sew…
I actually really like the look of the stitched edge. Use matching or contrasting thread – your choice.
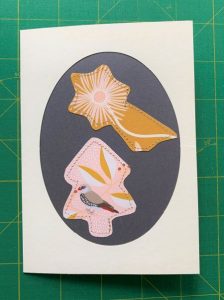
I had some cards with cutouts, and this design fitted perfectly in this shape.
I just glued the blue paper to the inside of the card.
(I do think a row of stitching echoing the oval shape would look fab here too.)
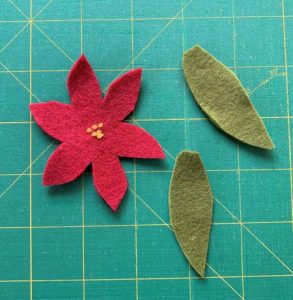
For the second card, I decided to use some left over felt scraps. (Fabric would be fine here too – with or without fusible on the back. Try ribbon or braid – that would add a fun element too.)
I cut out a simple poinsettia flower shape and stitched a few yellow knots in the centre.
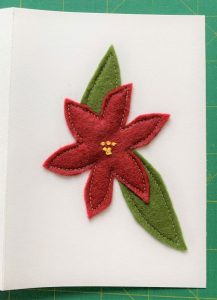
This worked great!
I stitched the two leaves first, then added the red flower over the top.
Being felt, this added a really pretty puffiness to this design, and I can highly recommend trying this technique with felt.
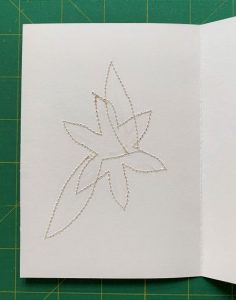
The back / inside of this card. It’s not offensive, but it’s not that pretty either.
A good solution would be to cut a smaller piece of (coloured) paper. Fold it in half and glue one side to the inside of the card front to hide the stitching, and then you can either glue down the other or leave as a flap, and write your card greeting on there.
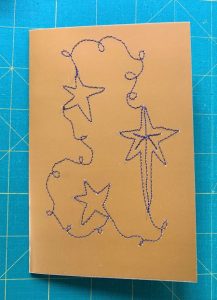
The third style of card I tried was just to free motion quilt a design.
Pros – It was super quick to do, and the only materials you need is a plain card and some contrasting thread.
Cons – I did this quickly, but I don’t love how every wobbly line of this design shows up clearly. I suggest you mark (LIGHTLY in pencil) a motif/s and stitch on the lines, and then you can fill (or not) the background. Stitching on fabric is more forgiving than straight on the card, but I think a clear line to follow rather than just winging it would give a neater result.
My three stitched Christmas cards.
I like all of them for different reasons, but my favourite would be the felt poinsettia – it just pops!
I do love this technique though!!! It’s really fun to do, and I love the thought of sewing with paper like this.
These cards are definitely one of a kind!
We’d love to see your cards, and let us know what you think about this technique below!!
Please post a photo of yours on Facebook and tag us (add @OnlineQuiltMagazine in the comment),
or on Instagram, use the tag #quiltersadventcalendar , and we can see what you’ve made.
Enjoy!!

20 responses to “Stitched Christmas Cards!!”
Leave a Reply

Welcome to our
Online Quilt Magazine Blog
Read through to discover hints and tips, articles from magazine contributors, sneak peeks and more!
Please enter your email address in the box below to receive notification of
new posts by email.
Like this idea!
Thanks – I like that it’s quick and easy too!
I like them all, but my favourite is the free motion stitched design. Looking forward to the next idea. Thanks Jody.
Thanks Margaret! They are surprisingly easy to sew – I just need to work on my wobbly lines! 🙂
I was wondering what needle size did you use when stitching on the paper stock.
I just used my regular 80/12 needle that was in my machine. It was due for a change anyway, so I figured it would be fine. You would probably want to change your needle to a new one before you went back to sewing fabric though.
I like the designs and your directions. I love your free motion design.
Thanks Sharon!
Loved them and hope to make a few!
That’s great – they are fun…!
Great ideas
Fun too!!
I like the card with the oval on the front. I would use a smaller star though. I also like the free motion stitched card.
Thanks. The star is a bit big – I agree. Need to find some better cookie cutter templates!! 🙂
Like the idea something to do on my list
🙂 perfect!!
You could make some very simple gift card tags too which would be lovely to receive
That’s a great idea!! Off to try that now too – thanks!!!
Nice info!
Nice!