
Fabric Covered Notebooks – Best Gift Idea Ever!!
November 21, 2022
Hi!
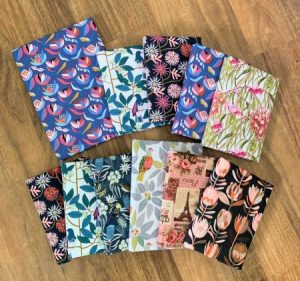
Guess what everyone in my family got for Christmas last year? That’s right – what’s not to love about fabric covered notebooks? Best gift idea ever!!
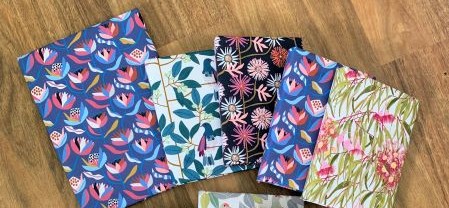
There’s lined ones for those who like taking notes, dot point ones for those who doodle, and plain paper books for our artists. It’s quick and easy to do, and you can have fun with some really cool print fabrics, customizing them too!
Here’s how to do it….
You Will Need:
A hard cover book that you want to cover (not spiral bound)
A piece of fabric larger than your book to be covered by at least an inch all around
A piece of light-weight batting the same size as your book. We used a light-weight pellon for ours. (This is optional, but does give a really great finish to your book.)
Clear drying glue. We used PVA glue, or you can use Mod Podge.
Pretty paper for inside the front and back covers. We used matching scrapbooking paper.
Brush for pasting glue
Bread and butter knife
To Make:
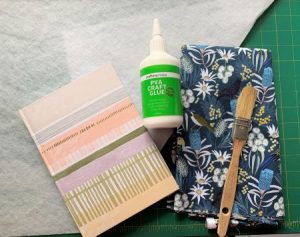
Our basic equipment.
You could cover books without the batting / pellon layer, and just glue the fabric straight to the book covers, but we liked the plush softer feel of a bit of padding on ours first.
The great thing about this is there is very little measuring that you need to do – use the size of your book to do it all!
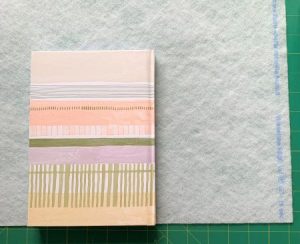
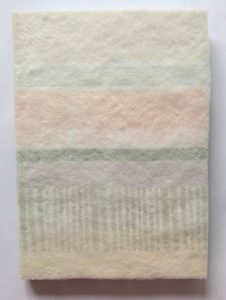
Start with your light batting.
Place the book in the bottom corner of your piece as shown, so the edges of the book are lined up with the edges of the batting.
Cut the batting along the top edge of the book.
Carefully flip / roll the book over, from the back, over the spine to the front, as shown.
Cut up the front edge and across the top, to get your rectangle of batting the right size to cover the outside of your book.
Use the batting as a guide to cut your fabric.
Lay the batting on the fabric and cut (roughly is fine) around the fabric so it extends about an inch to 1½ inches past the batting, as pictured.
Spread glue evenly with your brush all over the front cover of the book.
Place the book face down onto the batting as shown, so that the edges are all lined up.
Press firmly.
Now spread glue over the back of the book and down the spine as well.
Roll the book over on the batting to finish glueing the batting to the book.
You can stop and let it dry if you’d like at this point, or keep going and get it done in the one go.
You don’t need too much glue.
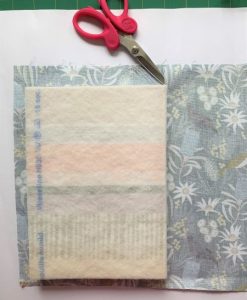
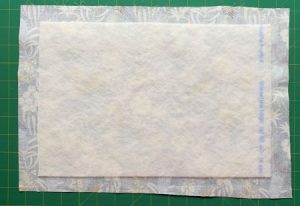
Place your batting covered book onto your fabric, so that there is a seam allowance edge all around.
When you are sure of the position, turn the book over and spread a small amount of glue lightly onto the batting – just roughly, but to help the fabric stay in place.
(You don’t want too much glue – if it soaks through the fabric you can end up with dry hard patches where the glue was.)
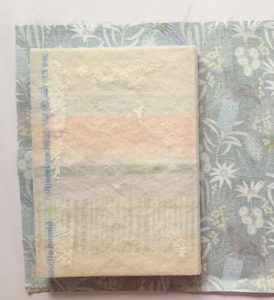
Place the book back with glue side down and press firmly.

Repeat to glue the fabric to the spine and back of the book.
When your book is covered like this, you will need to trim the ends over the spine.
Use scissors to carefully snip the fabric at each end of the spine, so it is cut right to the corner of the spine and book, but no further.
Don’t cut the fabric off – just cut into it twice so you can cover front and back of the book properly.
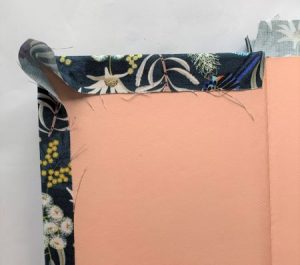
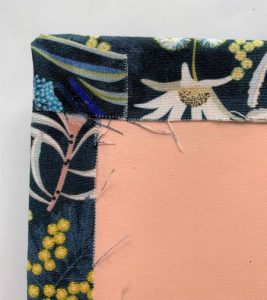
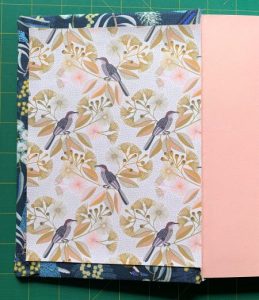
Now glue the fabric onto the inner covers.
As shown, spread a strip of glue around the three outer sides of the book, and fold the fabric in to cover the edges neatly.
A slight angled trim on the inner corner near the spine will help too.
Leave the corners up.
And then add more glue and fold the corners down neatly.
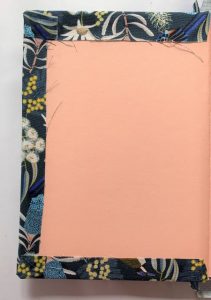
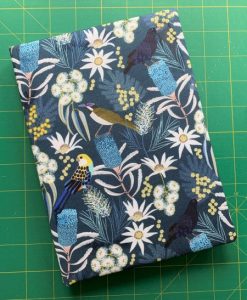
Ta dah! One half covered.
Repeat for the other half of the book.
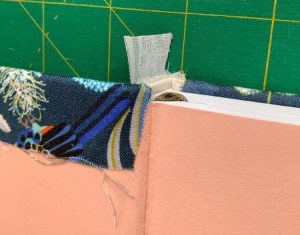
Now fix those ends of fabric over the spine.
You may like to slightly trim the length of the little strips left – we left ours at about ¾ – 1 inch long.

Brush a little glue of you like onto the fabric, then use your bread and butter knife (with the book opened out) to tuck the fabric into the gap between the bound spine of the book and its cover.
Do this for both ends.
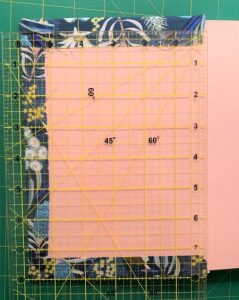
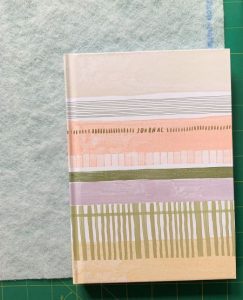
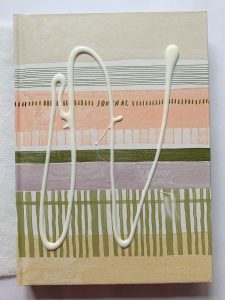
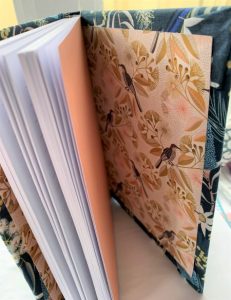
Finally, you just need to add some pretty paper to neaten up the inside covers.
You will need to measure this bit.
Use your ruler and work out the correct size for your book. You want to leave some fabric showing around the edges, and it needs to fit fairly snugly into the inner crease where the pages turn.
For this book, we cut ours to measure 5½ x 7½ inches.

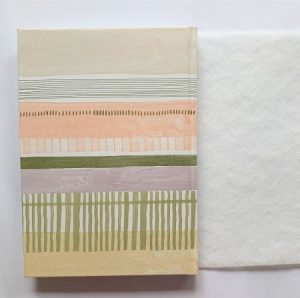
Scrapbook paper is strong and usually large enough that you can cut both inner covers from the one sheet.
We used a matching range of paper by the same designer that did the range of fabric we used.
Spread glue all over the back of the paper and place it on your inner cover as pictured.
Press well.
Repeat for the other side…
…and leave open to dry properly.
These make great stocking stuffers, and one you’ve done one, you’ll see just how quick and easy they are!
(I made 20 in one day with a bit of a glueing production-line set up.)
Have you tried this before? Let me know what you think in the comments below.
Ready, Set, Glue!
Regards,

10 responses to “Fabric Covered Notebooks – Best Gift Idea Ever!!”
Leave a Reply

Welcome to our
Online Quilt Magazine Blog
Read through to discover hints and tips, articles from magazine contributors, sneak peeks and more!
Please enter your email address in the box below to receive notification of
new posts by email.
A great and easy project for young ones to do and finish in a short time.
Definitely!
It’s been years since I’ve done this and thanks for the reminder. They look so good and your instructions are perfect.
Thanks Trish! Send me some photos of what you make!!
Will definitely be making these for diaries for next year.they look so pretty. If anyone has a foiling kit to add initials or name to them as extra personalising, would make each even more beautiful.
That’s a great idea!!
You could always applique on a name patch or other to the fabric first too, before you covered the book with it.
Thanks so lovely and practical. I will try a few.
Anita
They’re a bit addictive…. 🙂
It would be nice to have this PDF
Thanks Sandy (It’s included as one of the bonus patterns in this year’s advent calendar)