

Have You Tried Shadow Trapunto?
February 7, 2024
Hi!
This week, we’re taking a quick look at a really fun, but not-so-widely-known technique known as Shadow Trapunto.
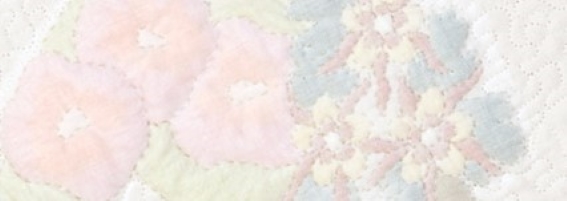
Shadow Trapunto is the name given to a variation of the traditional trapunto style where the front piece of fabric is very thin and sheer and the stuffing is coloured wool or yarn and can be seen through at the front, which gives lovely, soft pastel colours to the lightly-padded shapes.

(“Butterflies” by Annie London from Designer Stitches)
The top fabric can be polycotton or Batiste fabric. If you colour the shapes with wool, this is sewn in from the back without slitting the fabric. The blocks are first sandwiched in the usual way using this thin fabric on top, then thin batting/wadding and backing.
The design, or shapes to be filled are stitched in tiny running stitches (quilted) through all three layers. Do this first.
Using doubled yarn with a fairly blunt point yarn needle , the coloured yarn is inserted from the back, through the backing and across the shape to be coloured between the batting/wadding and the front fabric then back out the back again. The ends of the wool are cut very close to the backing and then worked underneath with the tip of the needle to hide them.
The coloured yarn just sits as a layer between the thin top fabric and the batting, which is what gives the lovely shadowed colour effect in this technique.
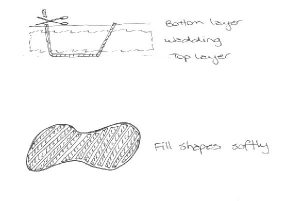
It is better to fill in the shapes softly, by pulling the yarn diagonally no more than a needle’s length, so your fabric doesn’t pucker. You will find too that you will need to use quite brightly coloured yarn in order to see the soft pastel colour effect once you have filled in your shapes. Too pale, and you won’t see the different colours from the front at all.
Preparation:
Using a single strand of pale embroidery thread, hand stitch small running (or quilting) stitches along the lines of your design that has been marked onto your layered panel. Make sure you outline each area to be filled with your yarn. When finished, rinse out the marking pen and dry the panel.
You will need a reasonable selection of coloured wools for the shadow trapunto.
Here is an example of the colours we chose – the balls of yarn correspond with the stitched example, so you can judge for yourself the types of colours that work best.
We would strongly recommend that you stitch a sample panel yourself first, using the coloured wools you have chosen, so you can see how they will work in your trapunto (and it’s great practice before you start on your big design!). We bought full size balls of wool, but as you don’t use very much, it may be cheaper or easier to purchase smaller skeins of tapestry wool.
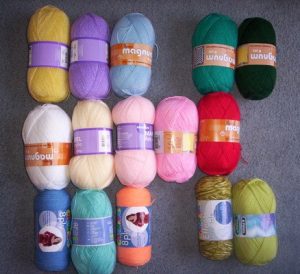

Lighter and brighter colours work better, as the dark colours end up looking all the same.
Refer to the photo and the instructions above, and working from the back, fill in each stitched area of your shadow trapunto design. Take care not to overfill each section as this will cause puckering and distortion of the quilted stitching in your finished design.

This was our shadow trapunto block, with part appliqued, and part shadow trapunto.
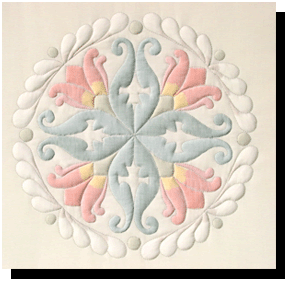
This is “Ray of Tulips” from Designer Stitches again, and Annie’s designs are well worth checking out if you’d like to give this fun technique a try.
Enjoy and do let us know if you give it a go!



I have done shadow work and the end results are beautiful. I have done it with threading the colorful yarns but also with pre-cut shapes from bright color fabric; they need to be pinned on to top fabric and then add batting and backing. This is soft and beautiful. When I finish a block I will send a picture.
Hi Maria! I’d love to see it – thanks!