

Exploring Blocks Sampler Quilt – Month 8
February 28, 2024

Hi!
It’s the end of the month again already, and you know that that means… It’s time for the next block in our Exploring Blocks Sampler Block quilt!!! This month we’re up to Month 8, and it’s the classic Greek Square Block we’re playing with this time.
To remind you – we’re working through manipulating a series of classic quilt blocks, to turn them into this quilt, as a fun take on the regular sampler quilt style.
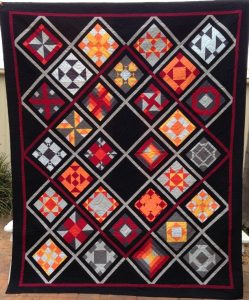
If you’re new to this project – the info is all here in our previous blog posts – you’ll find fabric requirements in Months 1 and 2, and work your way back through our earlier posts to find all the patterns you need.
So let’s get started then!
Block 8 – Greek Square Block
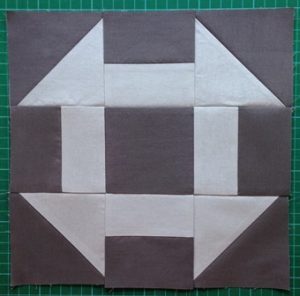
You Will Need:
Two (2) fabrics that contrast. We used pewter (dark) and silver (light).
* You will need to make THREE (3) of these 10 inch Greek Square blocks. (Note – this is a different block to the Grecian Square Block we made two months ago.) Refer to the rotary cutting guide below for cutting directions and quantites for EACH block.
Cut:

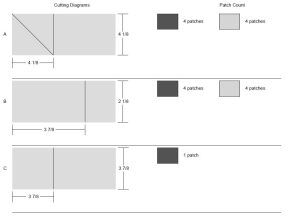
The measurements for “A” are 4 1/8 x 4 1/8 inch squares. You will need to cut 6 squares in total of the dark grey and 6 squares of the light grey fabric.
The measurements for “B” are 3 7/8 x 2 1/8 inch strips. You need to cut a total of 12 strips of each of your dark, and light grey fabrics.
The measurements for “C” are 3 7/8 x 3 7/8 inch squares. You need a total of 3 dark grey squares.
Assembly:
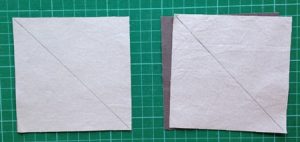
To start, make the half square triangle units for the corners of the block.
Mark a diagonal line on the wrong side of two of your silver A squares.
Pair the silver squares up with matching A pewter squares, with right sides together.

Sew a ¼ inch either side of the marked line, then cut on the line.
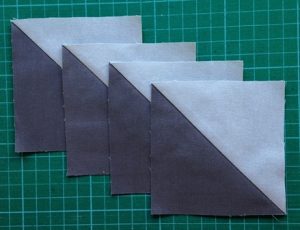
Open out and press, so that your two pairs of squares give you four half square triangles.
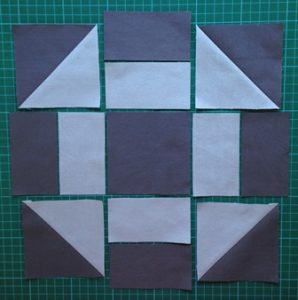
Lay out your block as pictured.
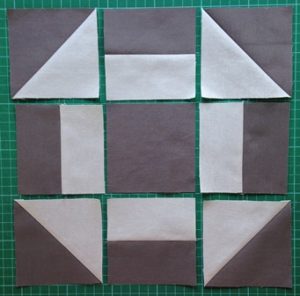
Join the silver and pewter strips together in the middle of each side and press seams well.
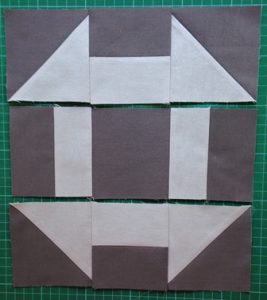
Now it’s just a 9-patch to piece together.
Join the units into rows.
Press seams inwards on the top and bottom rows, and press seams outwards on the middle row.

To finish, sew the rows together and press well.
Make three of these blocks in total.
Also known as the Monkey Wrench Block, this block gives great secondary patterns when repeated in a grid layout, or separate out on point for a simpler, more classic design.
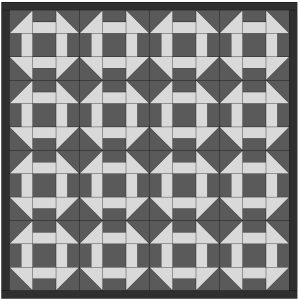
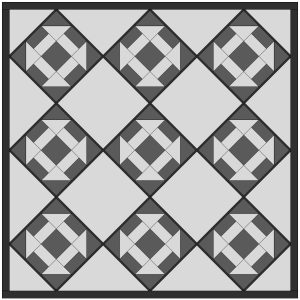
4-Patch:
And now let’s play! This block can also be cut into 4-patch blocks, the units rotated, and re-pieced, for a completely different block.

Cut one of your Greek Square blocks into 4, as shown.
As your finished block should measure 10½ inches square, you should be able to cut in half vertically once at 5¼ inches, and do the same horizontally.
However – if your block is slightly out, don’t worry – it is more important to cut evenly through the middle of the centre square, as shown.
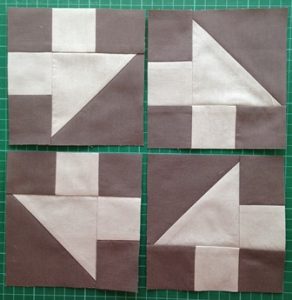
Try some variations. You might like to rotate two opposite corners only…

…or rotate all quarters equally as we did.
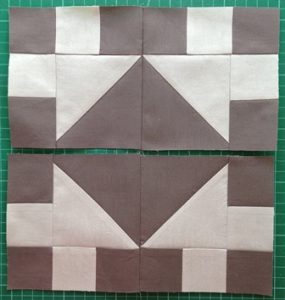
Sew into pairs, and press seams in opposite directions.

Join the pairs together to finish your 4-patch variation.
9-patch:
And don’t stop there! Now let’s try a 9-patch as well!!
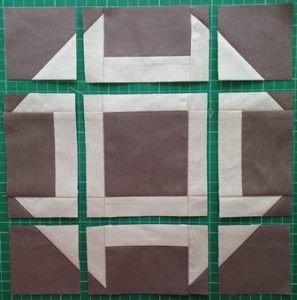
This is an UNEVEN 9-patch.
Square up your block first, then cut 2¾ inches in from each edge, as pictured. Cut horizontally, and vertically to divide your block into 9.
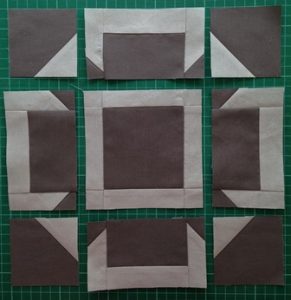
Rotate the middle units 180 degrees, as shown.

Sew the units into rows.
Press seams well, and in opposing directions between the rows.
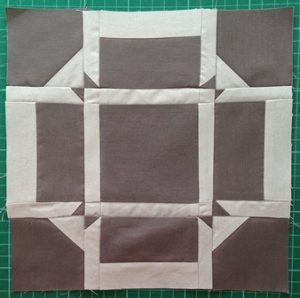
Finally join the rows together to reveal your new re-pieced 9-patch Greek Square Block.
As before, this finished block will be smaller than your original block (approx. an inch), but we will take care of that when we assemble your Exploring Blocks Sampler quilt top at the end of this project.
And we’re nearly ready to get assembling these blocks – there’s just one more to go!
Enjoy!!


I am enjoying getting these Online Magazines
Thanks Diane – I’m delighted to hear it!!
I agree with Diane. I am also enjoying seeing the variations one can do with these blocks.
Thanks Susan! It’s a bit addictive once you get chopping and rearranging classic quilt blocks, and it’s always fun to see what you can make from them.
I look forward to trying the different combinations that have been shown.