
Pineapple (Block) Pincushion Pattern
May 29, 2024
Hi!
Who doesn’t love a bit of alliteration? And what’s not to love about this gorgeous and oh-so-handy Pineapple Pincushion Pattern??
This striking little pincushion was in our Premium Online Quilt Magazine a few years back, and as it’s still a favourite of ours, we thought it time to share again now.
If you’ve admired the classic Pineapple block from afar, but been a bit scared to try it, then today is the day to jump in boots and all, and give it a go. It’s actually much easier than you’d think, and is guaranteed to have that “Wow!” factor when you’re done, so gather some scraps and let’s give it a go!
Pineapple Block Pincushion
You’re going to love piecing this stunning Pineapple Block Pincushion! Make yours scrappy, or choose a colour scheme like we did, and foundation piece this gem you’ll be proud to use in your sewing room.
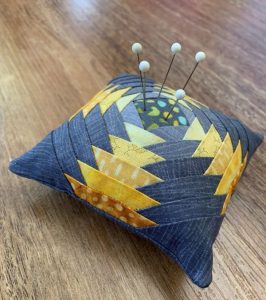
This pincushion is approximately 4 inches square, and 1½ inches high.
You Will Need:
Small amounts of fabric for piecing – we used leftover scraps for ours, in a graduated variety of yellows and greys. You will need a 4½ inch square for the back too.
Stuffing for the pincushion
Needle and matching thread
Assembly:
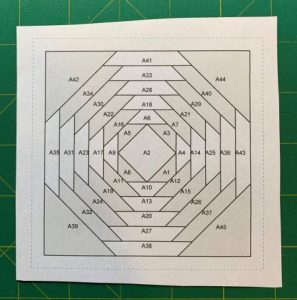
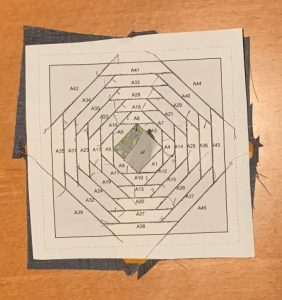
Print off the attached foundation piecing template. (The link is at the bottom of this post.) You can use this paper template to make your pineapple block.
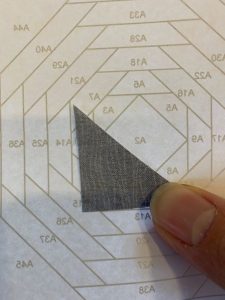
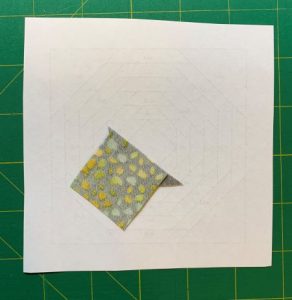
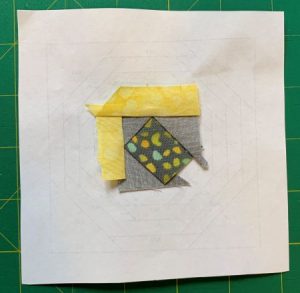
To start, cut a piece of fabric larger than the size of the piece it is to cover, and place it on the back of the paper template.
As shown, hold it up to the light, to make sure it covers the piece fully.
Pin in place.
Add your second piece. Again, make sure it is large enough to cover the marked piece.
Place it face down (so right sides are together on the back of your paper), and aligned so when it flips over to be right sides up, it will cover the marked area properly.
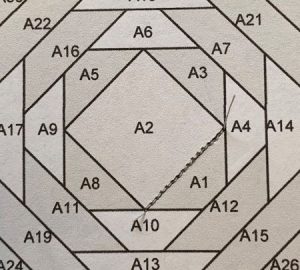
Turn your paper over, and sew on the printed line between A1 and A2, so you sew through the paper to the fabrics on the back.
Note – turn your stitch length down to quite small stitches – this makes it MUCH easier to remove the paper later.

Flip over your A2 piece and press.

Before you add the next piece, fold back your paper on the line, and trim the fabric so there is a ¼ inch seam allowance extending past the marked line on the template.
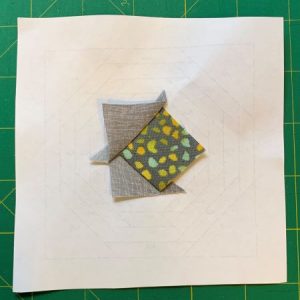
Do the same to add the A3 piece. Position with right sides together on the back of the paper, then sew from the front, turn, flip and press.
Trim the excess before you add A4.
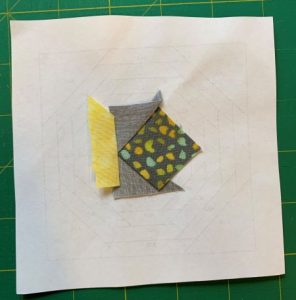
Keep adding pieces in order, and pressing and trimming after each addition.
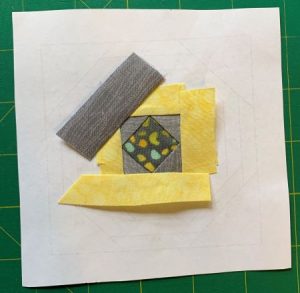
Take note of your colour placement. The pieces are not always added in a systematic order.
If it helps, colour in your paper template first, so you know which colour fabric needs to go where as you add them.
We used yellow scraps going from lightest in the middle out to a darker yellowy-mustard at the outer edges.

Keep adding and pressing, and trimming.
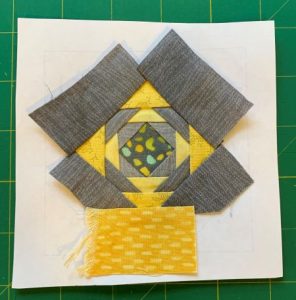
You will see the pattern emerging as you add more pieces.
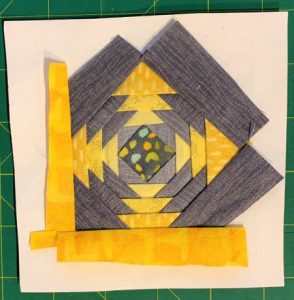
Add pieces until you have finished. There are 45 in this block.
Make sure your outermost pieces are large enough to cover the seam allowance for the block. (The dotted line on the template.)
Trim your block to size, using the seam allowance marked by the dotted line on your template.
Then start removing the paper.

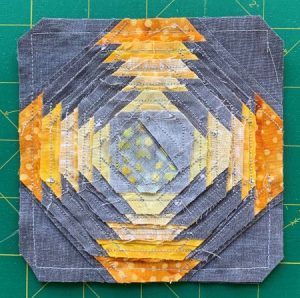
Removing the paper is easy. Just give the block a little stretch in a couple of directions, and the paper will part on the perforated stitch lines as shown.
Be gentle, and remove each piece. (You may find it easier to start from the outer edges too, and work your way in.)
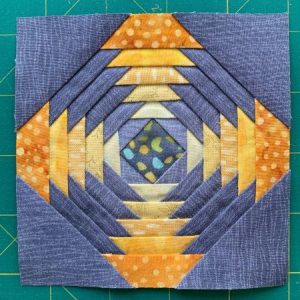
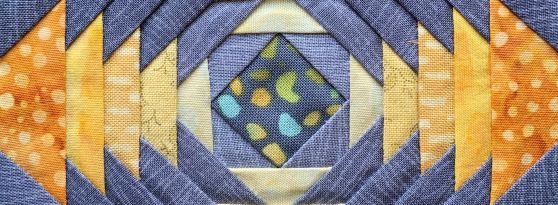
Your finished Pineapple Block.

Cut a square measuring 4½ x 4½ inches for the back of your pincushion.
With right sides together, pin the top to the back, and sew with a ¼ inch seam allowance, making sure to leave most of the middle of one side open to turn the block and stuff your pincushion.
Trim across the corners (close to but not through the stitching), to reduce bulk in the corners.

Turn right sides out and poke out the corners with a pencil or closed pair of scissors.
Tuck in the seam allowances at the gap and press the block well.
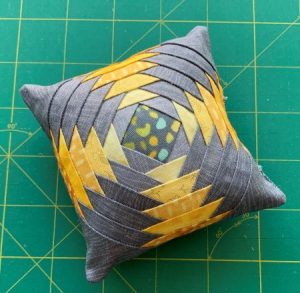
Stuff your Pineapple Block Pincushion with toy fill, and hand sew the gap closed with matching thread.
Add some pins and enjoy using your new pincushion!
And Remember – For more fun quilt patterns, and new and interesting ideas, check out the Online Quilt Magazine at www.OnlineQuiltMagazine.com .
With 4+ Patterns per issue, and Heaps of Hints and Tips and “How To’s”, at less than $3, it’s the Best Value Quilty Bargain you’ll find!
Download the full pattern for your Pineapple Block Pincushion at:
https://www.onlinequiltmagazine.com/members/content/f/id/1202
Enjoy your week, and remember to let us know what you think about this pattern, and share photos of your Pineapple Block Pincushions too – we’d love to see!

3 responses to “Pineapple (Block) Pincushion Pattern”
Leave a Reply

Welcome to our
Online Quilt Magazine Blog
Read through to discover hints and tips, articles from magazine contributors, sneak peeks and more!
Please enter your email address in the box below to receive notification of
new posts by email.

Really cute pattern but I have one question. Why do you not add full circuits of each color before you move to the next color? I piece it the same way I would piece an Economy Square, but there may be a pressing issue with the seam allowancesI enjoy your newsletters very much.
Hi Brenda! Good point. In this case, I followed the order shown on the template when I printed it off. I’m sure you could add the pieces in rounds and it’s not going to be a problem. I think in this case it was set up to reduce seam bulk in parts.
This looks like fun can’t wait to try it.