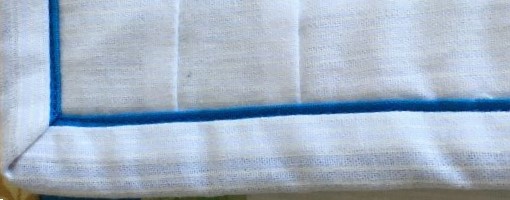

How to Make Faux Piped Binding
June 5, 2024

Hi!
This week I thought I’d share a quick tutorial on how to make faux (fake) piped binding. This is an easy and super effective way of adding a bit of wow to your finished quilt, and a binding skill that you’ll want to add to your repertoire.
You can use this binding technique on any quilt, and it’s especially effective when you want to add a tiny contrast of colour to the edge of a quilt. It’s great to add a pop of colour to a plain border on a quilt, or it works the other way too – if you have a patterned fabric quilt, then a plain colour pop with a busy print outer binding works just as well to frame around your quilt.

This was one of the projects from last year’s Quilter’s Christmas Advent Calendar, and as you can see, the faux piped binding frames the stitched scene perfectly, and really finishes off this little quilted wallhanging.
How to Make Faux Piped Binding

It starts with lengths of two different fabrics.
For the example above, you would cut from your white fabric a strip measuring 1¾ inches wide.
From your navy blue fabric, cut a strip the same length, and 1½ inches wide.
(The wider strip will be the one that makes the piped effect – it will be the pop of colour.)
Join lengths if you need to, to make the length of binding you need for your quilt.

Sew the two long strips together lengthways with a 1/4 inch seam and press the seam toward the white side. It is important to press this seam towards the wider strip in your binding, as this works to fill the ‘piped’ edge, and make it more like a piped binding, rather than a flat flange.
Fold in half lengthways with wrong sides together and press well.
Your white will show as a little peeper at the top of the blue side.

With the white side up, stitch your binding to the BACK of your quilt, mitring the corners as you go.

Fold the binding to the front, and topstitch carefully along the inner edge of the white peeper (with white thread) to secure the binding in place.
I love that it’s all done by machine (as it’s a quick finish), and when you fold over the mitred corners, it will all match up perfectly too.
And look how effective a faux piped binding is on this trio of tablerunners!


I do hope you will give this technique a try, and as always, please leave a comment and let me know what you think!
Enjoy your week!

PS. Remember to send in your photos of your Exploring Blocks Sampler Quilts or quilt tops before the 20th of this month too, so we can feature them in our July Online Quilt Magazine! Please forward them to me at jody@onlinequiltmagazine.com


Thank you I must try this’
I like this Jody – will have to give it a try! Thank you.
This truly is easy, AND it’s a great idea if you haven’t got enough fabric for the binding you really want to use. as the main one that shows uses the least fabric.
So clever, I love Kerry’s tip, too
Thanks for sharing.
Anita
Thanks indeed for the binding lesson and will try it with enthusiasm. Elizabeth J.