

Fussy Cut Fabric Gift Tags
October 30, 2024
Hi!
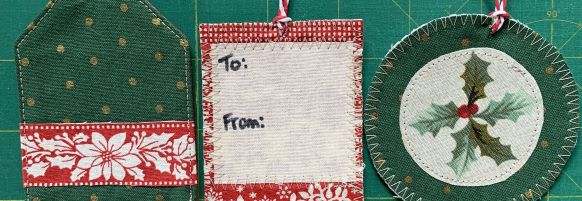
I have a bit of a treat for you this week… (and that’s not the “Trick or Treat” kind)! This is all ‘Treat’, I promise, as we’ve been working hard for months now on a bunch of brand new projects for you, in our Advent Calendar this year, and I couldn’t hold off any longer, and just had to share a few with you now, to give you a bit of a head start for this Christmas.
As Quilters, I know we like to get our hands on new projects to make, and we also like to discover new techniques, and have a play around with using them, and so I’ve designed a few smaller projects for our blog, all exploring the technique of Fussy Cutting. It’s a bit like a free mini course really, as we’ll start with Fussy Cut Fabric Gift Tags today, and expand through a few other ways of using this technique with our following projects, building on these skills in each project as we go.
Follow through these next few blog posts in order, and we’ll focus on how to do this easily, one step at a time, with lots of photos to get you on the right track. This is a fun and easy technique once you get confident with it, and the best way to gain confidence is through practice, so these fun little gift tags really are a perfect place to start! 🙂
So what is “Fussy Cutting”?
“Fussy cutting refers to cutting fabric while paying deliberate attention to the placement of a print or design with the cut piece.”
Sometimes you’ll find you’ve had what I like to call a ‘happy accident’, where you’ve managed to highlight part of a particular print in a quilt block without really meaning to, but when you discover a few simple tricks to using this fussy cutting technique more deliberately in your projects, the sky’s the limit!
Christmas Fabric Gift Tags
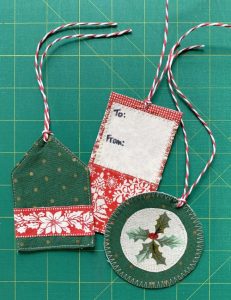
What I love about these Christmassy gift tags, is that aside from being re-usuable, they’re super quick and easy to make (and don’t we all love a quick ‘win’ with these kinds of projects), and they’re unique – no one else will have tags like yours!
So let’s get started with our first style of gift tag.
This tag has an angled top, and you can make yours in whatever size you’d like. I will suggest the measurements we used, but you’re in control, so feel free to vary it as much as you’d like!
Start with two pieces of fabric, measuring about 3 x 4 1/2 inches.
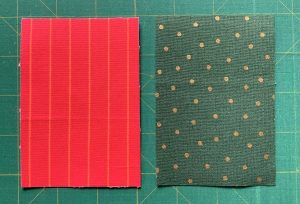
Add a piece of fusible interfacing to the back of each piece. (This is just to keep it a bit stiffer, so it hangs like a proper tag.)
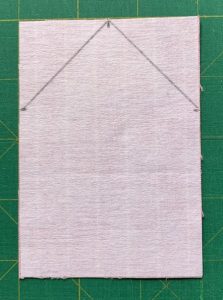
Use a pencil and mark the centre point at the top, as shown below. Also mark 1 1/2 inches down each side (from the top), and then join those points to make the angled top.
And now for the fun bit!
Go through your stash and find some Christmassy prints that you can fussy cut and use to decorate your gift tag.
We found this pretty scandi Christmas print, and loved all the options for fussy cutting here.
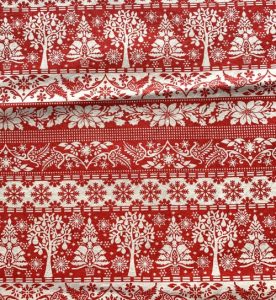
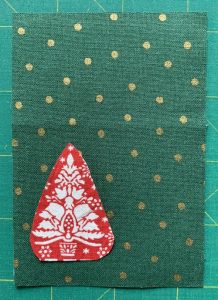
We tried cutting out just a tree shape, to stick on the bottom corner of the tag,
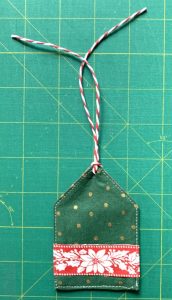
… and in the end, decided to fussy cut the strip with the poinsettia flower.
We cut the strip, and arranged it so the main flower was centered, and down towards the bottom our tag. (Don’t go right to the bottom, as you need to leave a seam allowance.)
You could sew this in place, but as it’s just a small tag, we used a scrap of fusible webbing (for applique) and just fused the poinsettia strip to the front of the tag.
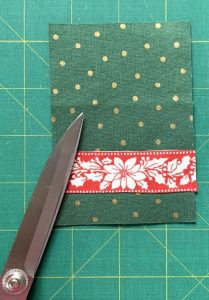
With that done, it’s time to put your tag together.
Lay your fabrics so right sides are together,
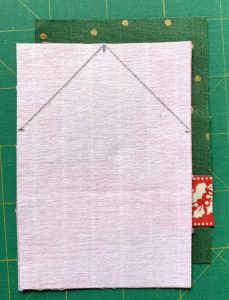
And sew up one side, up to the point, and back down the other side. We used a 1/4 inch seam, and sewed inside the marked point as pictured.
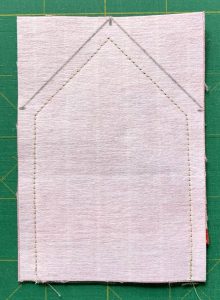
Trim the excess fabric off the point and top corners.
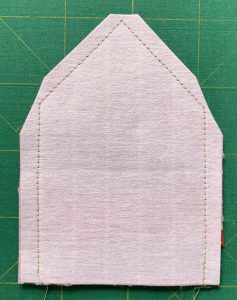
And turn right sides out. Poke out the top point with a pencil, and then you can iron it to flatten the seams.
Tuck under a 1/4 inch seam allowance at the bottom and press well.
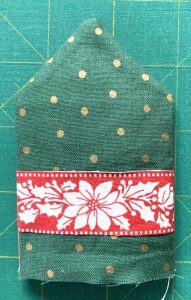
And then just topstitch around all sides to finish.
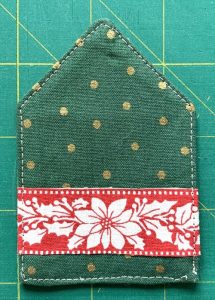
Now, it’s not a tag unless we can tie it to a gift, so use your unpicker / seam ripper tool to cut a small hole through all layers of fabric near the top of the point.
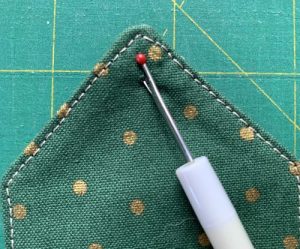
We used a 12 inch length of red and white string for ours, but ribbon or cord or even a fabric strip would work just as well.
Fold the string in half, then put the folded end through the hole. Pass the two ends through the loop as shown, and pull tight to add your hanging string.
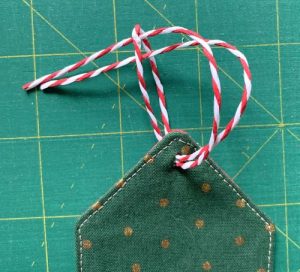
Ta Dah!!
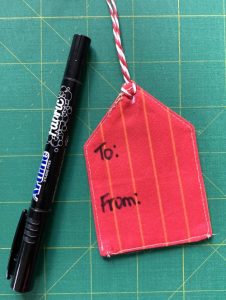
And to finish – add your To and From on the back with a Fabric marker and you’re done!
This is a quick and easy project, made in only about 15 minutes, and it will add a special handmade touch to your gifts this year.
But Wait… There’s More!!! 🙂
We simply couldn’t stop at just one, so here’s another couple of variations for you to try as well.
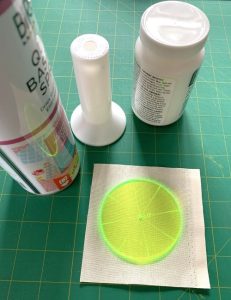
We made a round tag for our next one. Look at what you have on hand to use as circular templates too. Spools, or bottles or spray cans are all a good size for this tag.
Clear templates are excellent for any fussy cutting. Because you can see through them, you can very accurately position just what you want to cut. But what do you do though if you don’t have any?
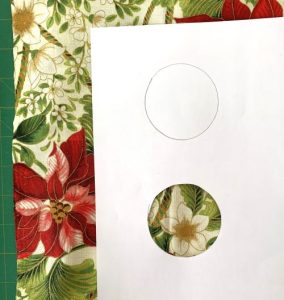
The best way around it if you don’t have a see through template is to make yourself a viewing window like this.
Simply trace around the shape you want and cut it out from a larger piece of paper or cardboard, to make yourself a little viewing window to see what would look good cut out in that size.
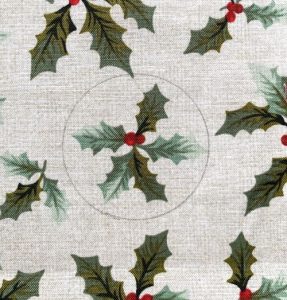
We used this holly print fabric for our round tag, as there was a variety of holly sprigs of different sizes, and they were spaced fairly openly, which meant we could easily fussy cut a single sprig.
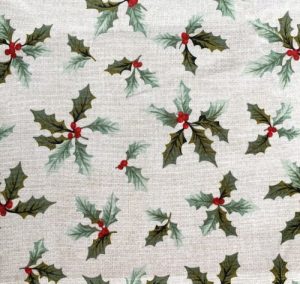
Use your template or cut out paper ‘window’ to find the right one to fit,
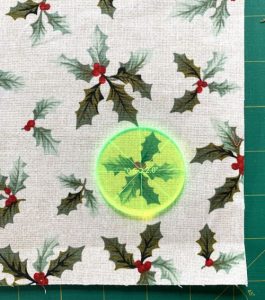
… and trace either around the plastic template, or inside the cut out ‘window’ to mark your shape.
We used pencil for ours, but you could use a water erasable marking pen if you wanted to.
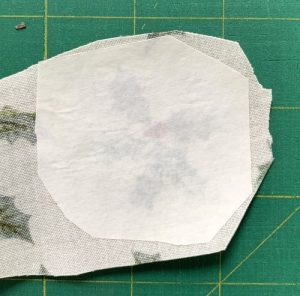
Cut out roughly and add some fusible webbing to the back. Then cut out on the marked line.
Again, we used two different fabrics for this tag.
Our fussy cut holly circle had a 2 inch diameter, so we made the tag circles with a 2 1/2 inch diameter.
Add fusible interfacing to the wrong side of the two tag fabrics, as you did for the first tag, and trace one larger circle onto the lightest fabric.
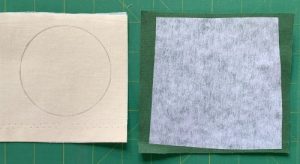
Layer the two fabrics, and cut out the circle shape from both in the one go.
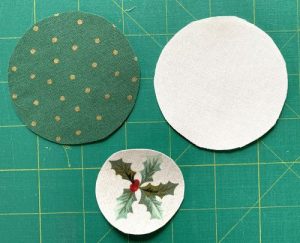
Fuse the fussy cut holly to the front fabric, and topstitch to secure it.
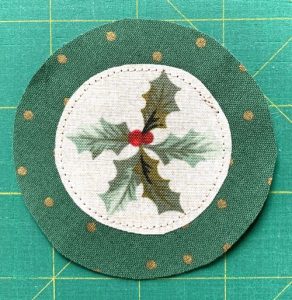
Layer the two larger circles with wrong sides together and zig zag stitch around the edge.
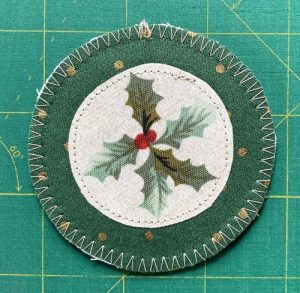
As before, cut a small hole and add your string / ribbon and write the To and From on the back, to finish.
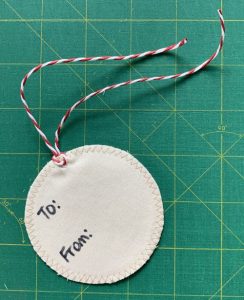
We made one more variation that was even quicker and easier to finish, and was still fussy cut to show off part of the fabric print.
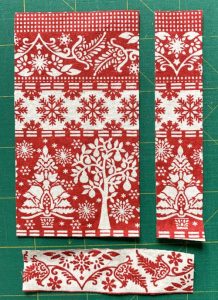
We went back to the busy Christmas print, and decided as it was in rows, that we could just cut a rectangle straight from it, for our third tag.
Have a look at your fabric, and you can work out the best size to cut to include what you want to show off, and still be the right kind of size for a tag.
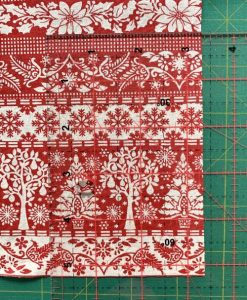
We cut a larger rectangle, and trimmed it down so that the two trees fit nicely at the bottom. (Our tag was about 2 1/4 x 4 1/4 inches.)
Then we cut a same size rectangle in another fabric too, for the back.
We cut a smaller plain square to fit up the top, and fused it in place with a scrap of fusible webbing.
Add interfacing to the wrong side of both rectangles, and zig zag stitch the square to the front, as shown.
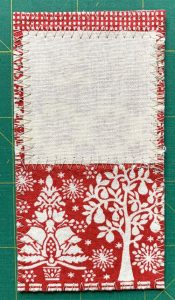
Layer the two tag pieces as before, with wrong sides together, and zig zag around all sides.
Make a hole, thread your string, and add the To/From in the box, and this one’s done too, and even quicker than the others!
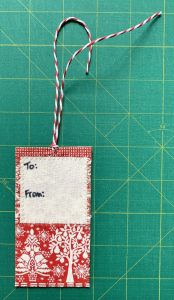
It really is that quick and easy, and even if you only have a few minutes to spare here and there, you can whip these hand made gift tags up a few at a time, so you have a bunch ready for Christmas this year. And of course, they don’t just have to be for Christmas…!!!

You can fussy cut anything using these techniques, from cute animals on prints for kids’ Birthday tags, to balloons, bikes or your favourite team’s logo.
Well done! You’ve learnt how to fussy cut for easy one-off applications in projects, and we’re sure you’re going to enjoy adding this in to some of your other quilt projects now.
Keep an eye out for our next post after Halloween, and we’ll add to these skills with another project, and discover how to fussy cut more precisely, for adding into pieced quilt block projects, when accuracy really starts to matter.
Please leave me a comment below, and let me know what you like about fussy cutting, or how you use it in your quilt projects now.
Enjoy!


WOW! What fun,and will try to do some tags as you suggest.. They are lovely and thanks for the inspiration.
You’re very welcome! Please share any you make – I love seeing what others make too.
Great idea. I’m going to try the round one today. I might even use some hexies that I’ve been saving!
That’s a great idea! Please share a photo if you can when you’ve finished!
Thanks Jody ,
Very useful at this time of the year ,but could also be used at Birthdays with a different fussy cut motif .Kindest Regards
Sheila
Absolutely!! 🙂
Looks like something I’ll do! Thanks.
That’s great!
Love the way you make tags. Never knew how easy it was. Thankyou.
I know! I love that you can whip them up much more quickly than you’d think.
WOW, thanks for the step by step instructions:)