

Fussy Cut Quilted Pillow
November 2, 2024

Hi!
Welcome back to the second part of our Free Fussy Cutting Mini Course, and now that we’ve covered the basics in Part 1, it’s time to stretch ourselves and dive into refining this technique, by mastering key skills like accurate cutting and piecing. It is this attention to detail that will take your fussy cut projects from good to great.
Like our Fussy Cut Gift Tags, we’re going to practice this on a small quilted project today. We made our fussy cut blocks into a quilted pillow cover, but you may decide to turn yours into a quilted table mat, or wallhanging instead.
As before, I’ll include our measurements as a guide, but you can work with your own chosen fabric, to decide on the best dimensions for your project.
Fussy Cut Quilted Pillow
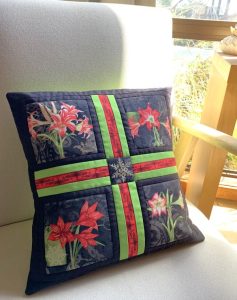
You can fussy cut almost anything, and we had a length of Christmassy Border Print Fabric that we wanted to use for this project. This fabric featured 4 different stems of flowers, and had some great patterned stripes, and smaller designs, and we decided they would combine nicely into this mini quilt project.
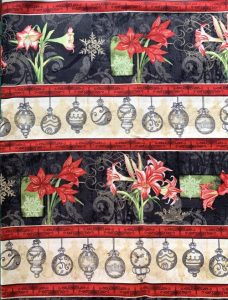
First, fussy cut the flower blocks. The size of these blocks is really limited by what else is around the flowers in this print. In this case, they were on a black background that was then bordered by red stripes, and we made the design decision that we just wanted them on the dark background, without the stripes.
The dark strip with the flowers was 5 inches high. We then had to check that we could cut squares this size horizontally too – so that we weren’t cutting into the next flower design.
And this is where some easy quilt math comes into play…
If I can cut a square that is 5 inches x 5 inches, I need to add a 1/4 inch seam allowance all round.
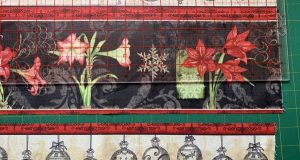
So we cut a strip with the 4 flowers that was 5 1/2 inches wide (and make sure to cut it straight, but parallel with the dark edges). This meant that we went a 1/4 inch into the red strip across top and bottom.

With that done, we just need to fussy cut the flowers.
The flowers need to be centered in the middle of each block, and this is where your precision cutting is important. The easiest way to do this is to turn your ruler into a ‘window’ like the cut out paper from last time, so you can adjust the position as you like, to centre the flower in the block.
Use masking tape (or we used a few post it notes), and mark the (5 1/2 inch) lines on your ruler.
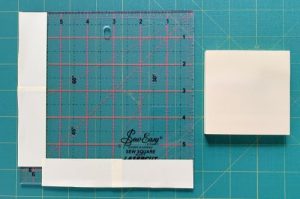
Now you can use the ruler to line up the flower in the middle of the block. Align the top and marked bottom edges of your ruler with the cut edges of the fabric strip, and then you can simply move the ruler left or right until you have the flower in the position you’d like. Think about the 1/4 inch seam allowances at the sides too.
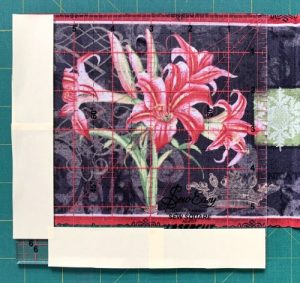
Trim the edge.
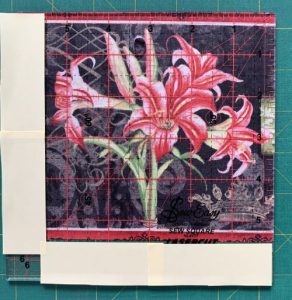
Then rotate your fabric, and line the ruler up again to trim the other edge, so you cut a perfect 5 1/2 inch square, with the flower in the middle.
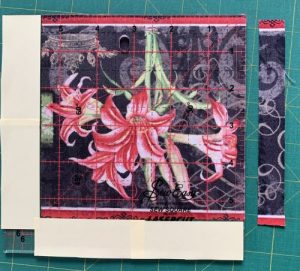
We cut the 4 different flowers in this way.
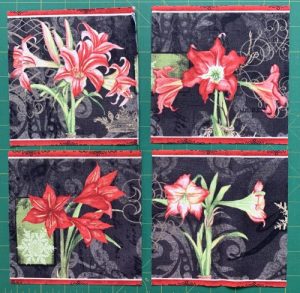
We decided a thin black border would frame the flowers nicely.
We cut strips 1 inch wide x 5 1/2 inches long and sewed them to the sides of each flower block.
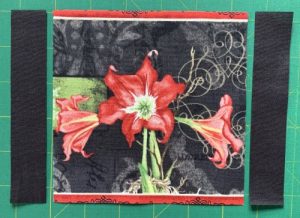
And added strips cut 1 inch wide x 6 1/2 inches long for the top and bottom.
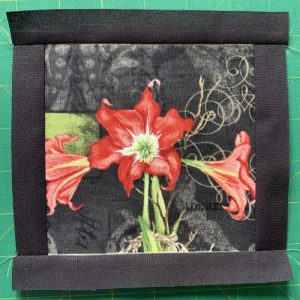
Our 4 framed flower blocks.
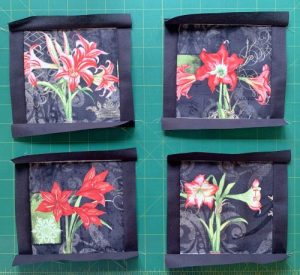
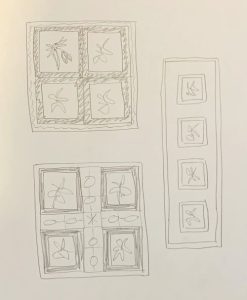
From this point, you may decide to do something completely different with your blocks.
Have a doodle on some paper and see what works best – we thought about a smaller square quilted mat with these four blocks all just joined together, or maybe spacing them out in a table runner, but then we decided to continue with the fussy cutting, and incorporate more of the fabric to make a larger square (but still mini) quilt.
We decided to use the red stripe as sashing, but we also wanted to use this snowflake as a cornerstone in the very middle.
The size of the snowflake determined the width of the sashing. Yep… quilt math again! 🙂
We used our ruler over the snowflake and worked out that the biggest size we could fussy cut easily was 2 1/2 inches square. This allowed for a 1/4 inch seam all around this snowflake too.
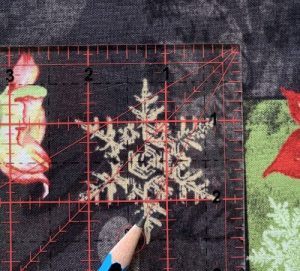
Fussy cutting the snowflake was fairly straightforward, as we could put the 1 1/4 inch mark on the ruler on the middle of the snowflake, and use the vertical points of the snowflake to line up the ruler, so it was straight.
Cut the top and right hand side, then turn the ruler, line it up at 2 1/2 inches again, and cut the other two sides.
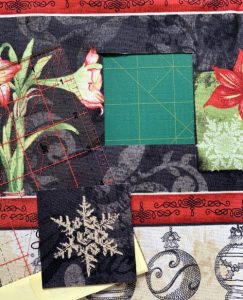
Now that we know the cornerstone is 2 1/2 inches wide, we can make sashing to fit.
We wanted to put a red stripe in the middle of each pieced sashing strip. Measure it, and add a 1/4 inch seam allowance to either side. These strips were 6 1/2 inches long, to fit along side the framed flower blocks.
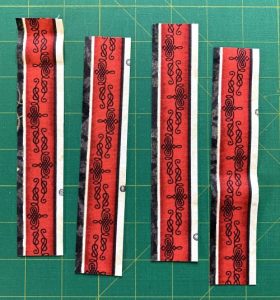
We added some bright green to match the flowers, and cut wider strips for either side of the red.
(We did measure and work it all out – 1 1/4 inch red strips, with 1 1/8 inch green strips to each side.)
If you’d prefer not to worry too much about working out these measurements, you can always add wider green strips, and trim down to match afterwards.
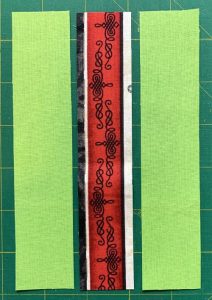
With all those pieces fussy cut and pieced, then it’s time to assemble this mini quilt.
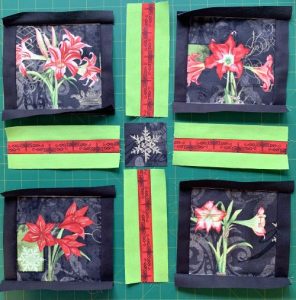
Join into rows and press seams in opposite directions between rows.
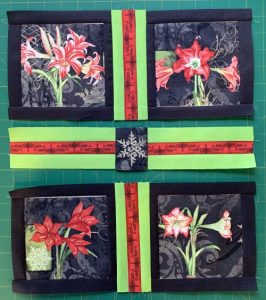
And join the rows together and press well.
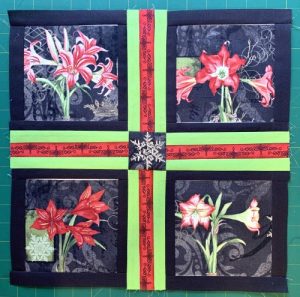
We added a final black border to ours. We added strips 1 1/2 inches wide x 14 1/2 inches long to the sides, and strips 1 1/2 inches wide x 16 1/2 inches long across top and bottom.
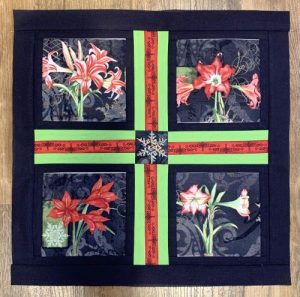
Layer for quilting as for a regular quilt.
We quilted ours simply, sticking to in the ditch quilting, as it was quite a busy printed top already.
Trim to square up when quilted.
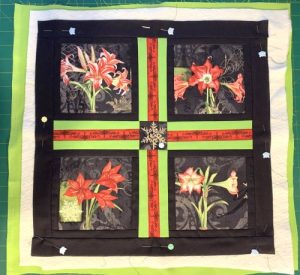
At 16 1/2 inches square, this was a perfect size for a quilted pillow cover, so we decided to just add an easy folded over back to it.
Cut two rectangles of fabric measuring 16 1/2 x 10 1/2 inches.
Fold over and iron one long edge twice, on both panels, to make a hem for the opening. Topstitch along the fold to secure.
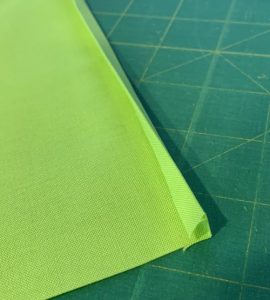
Lay your quilted pillow front facing up, and place the first rectangle backing on top with right side down, and so that the raw edges line up across the top and down the sides.
Place the second rectangle on top of that – again with right side down, and so that the bottom and side edges are aligned.
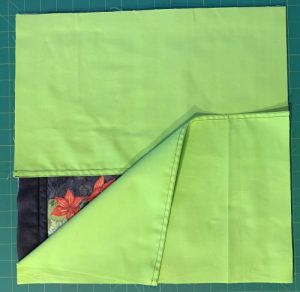
Sew around all four sides, and trim the corners before turning right sides out.
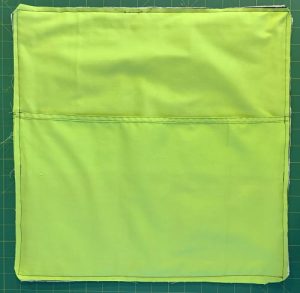
Finished!
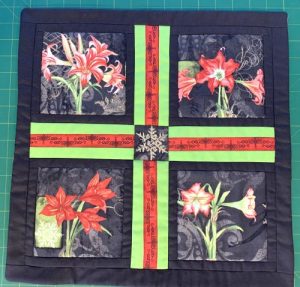
Find a pillow insert to fit, and find a new home for your Fussy Cut Pillow!

I hope now that you’ve finished this fussy cut project that you are feeling more confident about how to fussy cut for pieced projects. Just think about how you could spice up regular pieced blocks by adding a fussy cut dimension – a special motif in the middle of a classic quilt block, or add border print stripes to the mix and cut strippy looking star points from them!
This then leads to how can we use fussy cutting really creatively? How do you come up with an original design? Where to start with this process? What happens when you want to cut repeats of the same thing???
We’ll take a look at this kind of ‘creative flair’ in our final part of this three-part Fussy Cutting Mini Course, out here with a new pattern in a few days.
We’ll have more fun things to share with you after then too, and I do hope you’re enjoying how this look at the fussy cutting technique can allow to you to transform your handmade projects into gifts that truly reflect your attention to quilt making detail.
As always, please comment below and let me know what you think of this project, and how your fussy cutting journey is progressing. We love photos too!!! 🙂
Enjoy your weekend (and fit in some fussy cutting!)


A beautiful pillow! thanks for the article. I have done fussy cutting and it can really make the quilt block.
Thank you so much for this this tutorial. I have some border fabrics but didn’t really know what they were nor how to use them. They were given to me and I kept them because I loved the patterns. This really helped and I will definitely use them creatively.
Just brilliant Jody, thank you for the easy to understand instructions. Will definitely give it a go. Have some great fabric to work with.