

Fussy Cut Christmas Table Runner
November 5, 2024

Hi!
Welcome back, for the third and final part of our fun Fussy Cutting Mini Course!
We’ve covered a bit this past week – from the basics of fussy cutting single motifs, through to precision fussy cutting for pieced blocks, and we’ve worked through some project examples for how you can use these specific techniques too.
I know the gift tags are fun, and I hope you’ve had a play with some pieced blocks too. I’m sure you’ve improved your skill and technique through these practices, but now it’s time to move on and look at how you can unleash your creativity and make your own original designs through creating fussy cut blocks.
Today I have a new pattern for you to try, and once again, it’s more of a suggestion, as this time you will really be able to get creative. Stretch yourself, and have fun experimenting and you’ll be delighted with just how well this style of fussy cutting blocks works, and the kinds of unique looking blocks you can come up with. Best of all – it’s still quick and easy, and if you’re anything like me, once you start, it’s very hard to stop! 🙂
Fussy Cut Christmas Table Runner
One of the easiest and most rewarding ways I love to show off fussy cutting skills is through English Paper Pieced (EPP) blocks. Whether you prefer to sew these by hand, or by machine, these hexies and assorted other shapes are fun and quick to do, and honestly, the creative opportunities are endless!
I love sewing these by hand – I love the quiet sewing time, and watching the steady progress (and if I keep my hands busy at night in front of the TV, it stops me falling asleep and missing the end of what I’m watching 🙂 ). I get it though – I know many prefer to sew everything by machine, and as always, there’s a couple of different ways to still do EPP and sew by machine. You can either make larger sized shapes and cut accurate 1/4 inch seam allowances so you can machine piece, with plenty of “Y” seams, or you can still cover the papers, press really well then use a tiny zig zag or other decorative stitch to join the seams by butting them together and sewing over the joins from the top.
For this project, we’re going to concentrate on hexies and jewel shapes. We used 1 inch size hexies and the jewels to match, but feel free to change the size for yours as you’d like. If you need the templates for these sizes, you can download them at: https://www.onlinequiltmagazine.com/members/content/f/id/1261

Our quilted Fussy Cut Christmas Table Runner is 10 1/2 inches wide x 39 inches long, and we have a total of 7 EPP blocks.
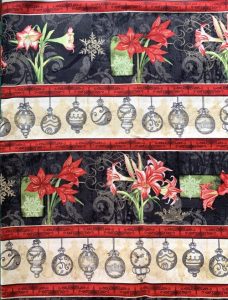
We used the same border print fabric for this project that we used for the previous quilted pillow project.
I find border prints are fantastic options for fussy cutting when you are doing EPP, as you’ll find that there’s lots of repeats of the prints, and when you often need 6 of the same thing for precise repeated designs, they are a really economical option.
The trick to cutting precise and accurately repeated fussy cut units is template plastic! (Of the see-through kind.)
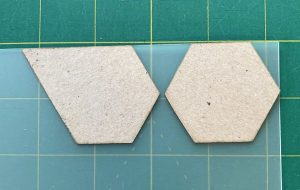
Place your paper templates (just one of each) on the plastic, and trace with a lead pencil (I’d recommend a 2B or 4B).
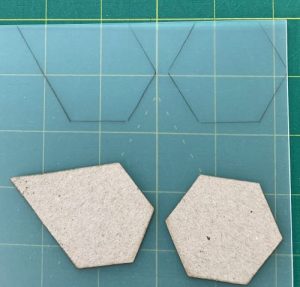
Cut them out carefully, and then you’re ready to get started.
Before we dive into the fussy cutting, let’s first take a quick look at some of the EPP blocks we’re going to make.
I find arranging the papers into blocks really fun – it’s like one of those Tangram puzzles we had as kids, and you can move the pieces around until you’re happy with your designs. I like to take a quick photo with my phone then too, so I have it handy to refer back to when I’m fussy cutting for my blocks.
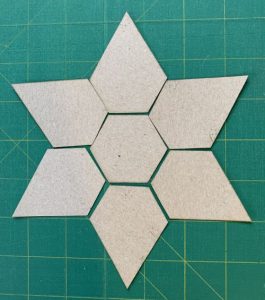
We made two of these for our runner.
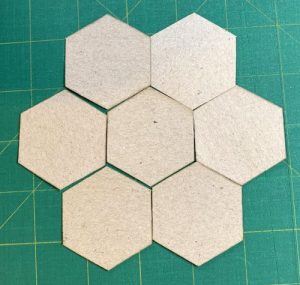
And also a classic Grandmother’s Garden hexie arrangement, with a jewel only variation that I especially love when it’s fussy cut.
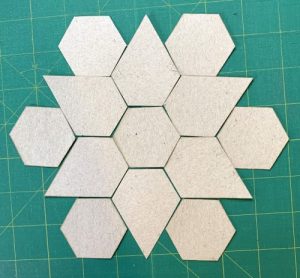
We designed a larger pieced block for the middle. As this is a Christmas runner, we liked the snowflake-like design of this one, but you could always add 1 inch triangle pieces around the edges to fill them in and make one larger hexagon block. (Read through to the end for some more examples of this.)
How to Fussy Cut Accurate Repeats
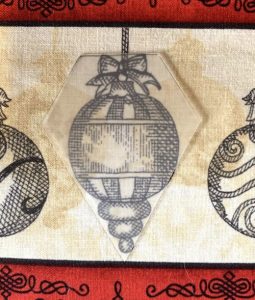
This is where it’s time to get creative! Use your template plastic shapes to play around with your fabric, and find designs that will be interesting when they are cut. For example, this longer bauble fits the jewel shape perfectly, and it could be really pretty when several are cut and arranged together.
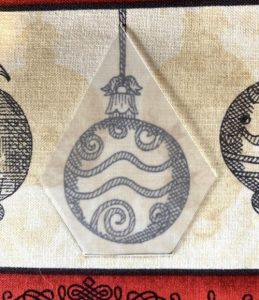
Same with this bauble. Maybe the longer straight string would make for a really interesting effect if they all radiated out from the centre.
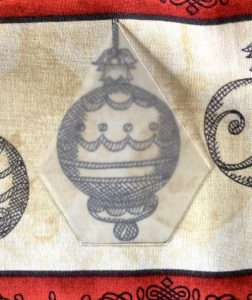
This one fits quite nicely too.
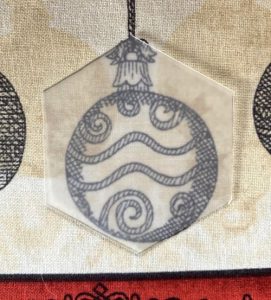
And the hexie shape fit perfectly over one of the small round baubles too.
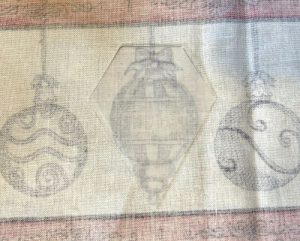
Once you have decided on which part of the print you want to fussy cut, turn your fabric over, and work from the wrong side. Usually it’s fairly easy to see through, but if your fabric is darker, or the print paler, then you may like to use a light box to help you with this step.
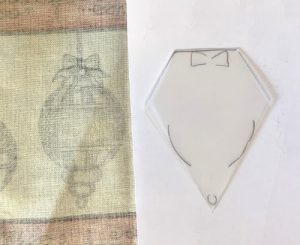
Arrange your template plastic shape over the print (how you want the finished shape to be), and use your lead pencil again to mark some of the pattern points onto the template. We drew the bow, the lower curve of the round part of the bauble, and the little ball on the bottom. This is so you can line the template up again exactly to cut the repeat shapes for your block.
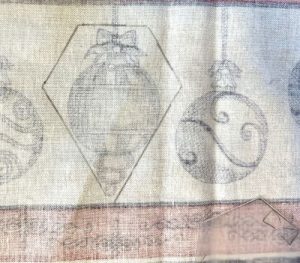
When it’s lined up, trace around the shape with your lead pencil. (It’s on the back, so this pencil mark can stay there.)
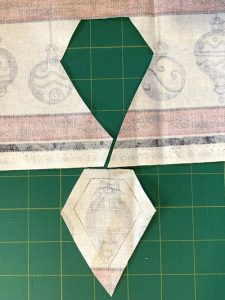
Cut out around the marked shape, leaving a good seam allowance. You really don’t need to be strict with a 1/4 inch seam allowance here (unless you’re machine piecing), and I find a more generous allowance helps when you’re basting.
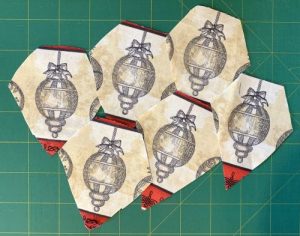
And Ta Dah! 6 perfectly precise repeats of the same design. The seam allowances vary slightly, but when you baste them following the marked pencil lines, they will be all the same.
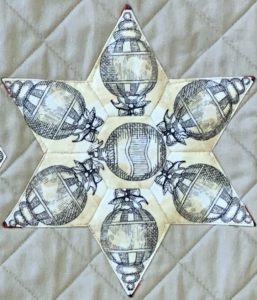
We used those units for this block, with a hexie in the middle.
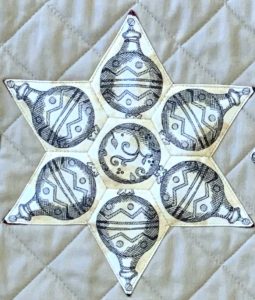
And we did it again with a different bauble to make a different looking block.
Flower Blocks
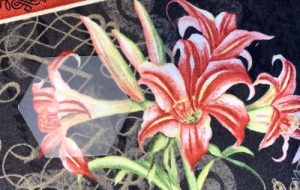
We decided to highlight some of these striking red lilies for our Grandmother’s Garden Blocks.
Which part to use though?
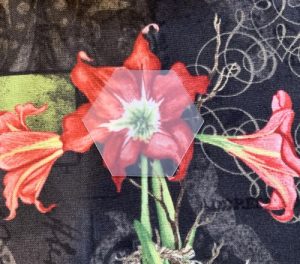
Get your plastic hexie template on the job, and try out some options to find what you like the look of.
This one would be a lot of red, and I wanted a bigger contrast, so I tried another spot.
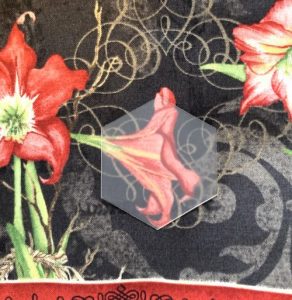
This could be cute, but maybe not really interesting enough as it is. I’m going to come back to this one though…
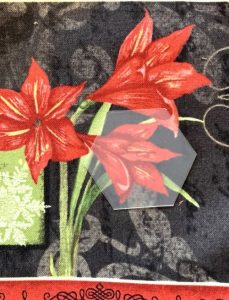
This one seems just right. I can fit the whole flower, with some of the background for contrast.
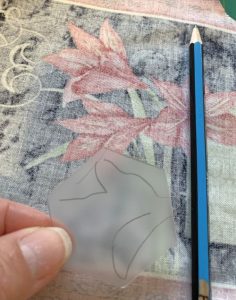
Turn the fabric over, re-align your plastic template and mark a few key lines, so you can line it up accurately for the rest of the pieces.
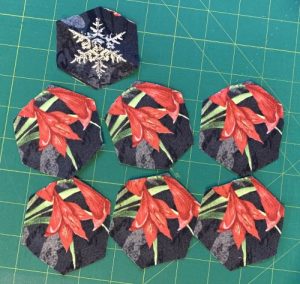
Six perfectly precise hexies for the outside of this block, and a snowflake contrast for the middle.
Sewing the EPP Blocks
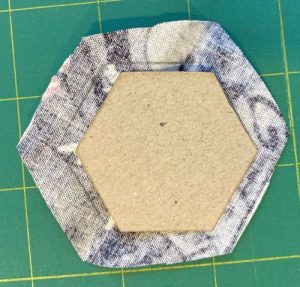
The first step is to baste the fabric around the paper shape. This is where your marked pencil lines become important, as you can simply place the paper shape into the marked outline of the shape, and then fold up the edges for basting, knowing that each fussy cut hexie will end up the same.
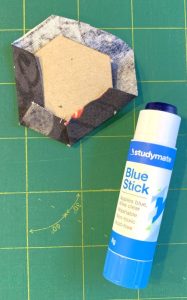
You can either thread baste, or use a washable glue stick. I used to use thread, but am now a definite glue convert as it really is so much quicker and easier on the fingers. You can buy special glue sticks from quilt shops for this, but when you’re doing a few of these blocks, I find it just as easy to use a small glue stick from an office supplies store. (They’re much cheaper, and hold more glue.)
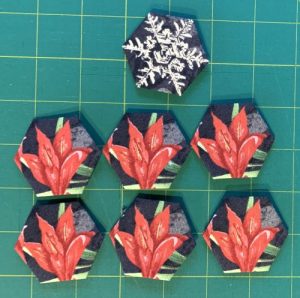
…and done. 7 basted hexies for our block.
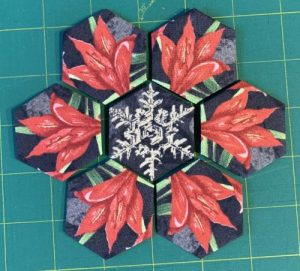
The great thing with hexies is that the sides are equal, which means that you have up to 6 different layout options for this block if you rotate them around.
You could have the flowers all coming out from the middle snowflake hexie.
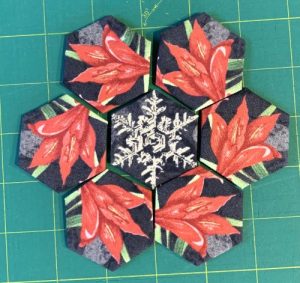
Or you could rotate them slightly and end up with an interesting starburst effect with the green stems radiating out from the snowflake instead.
This arranging part is fun, and you’ll often find that even though you cut the shapes planning them one way, that when you play around with them, you might like a different arrangement even more. Little surprises like the green stem add more than you’d think sometimes too.
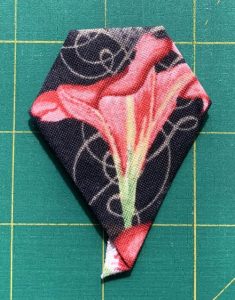
Which brings me back to the flower from before. It didn’t work so well with the hexie shape, but the jewel shape allowed more of the flower stem to fit, and so we decided to use it for the Grandmother’s Garden lookalike jewel block.
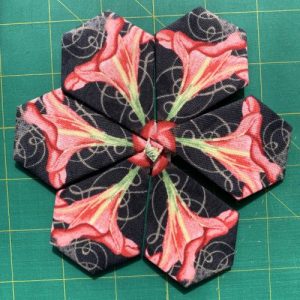
And check out this happy accident! We couldn’t avoid that tiny bit of red at the bottom of the flower stem when we fussy cut these pieces, but look at that lovely centre spiral when the pieces are all laid out together!!
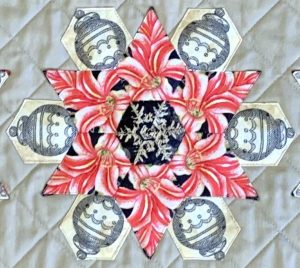
We used a mixture of designs for the large middle block.
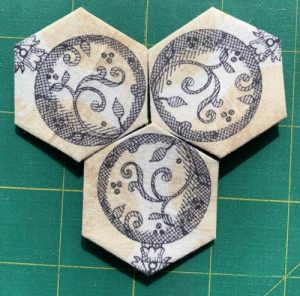
And we pieced two sets of three hexies for the smallest blocks at each end.
Again, play around with the placement – baubles pointing out, or…
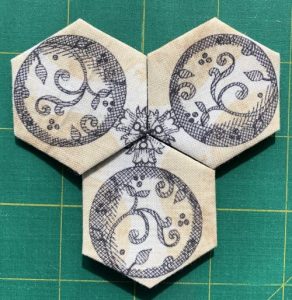
…a better look perhaps with baubles pointing in, and making a pretty motif in the middle.
Assembly
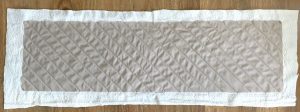
We decided we wanted to applique our EPP blocks onto a quilted background, so we cut a strip measuring 11 x 41 inches, and layered it for quilting with a backing and batting.
We quilted lines at 45 degrees, and spaced 1 1/2 inches apart, and then turned it and quilted the diagonal lines the other way, for a squares on point grid.

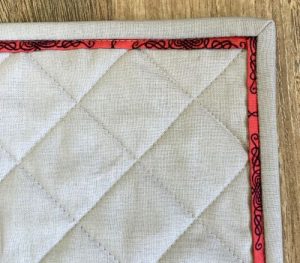
Trim to square up, and then we decided to fussy cut a red strip from our fabric (remember from the sashing step in our previous Fussy Cut Quilted Pillow project?) and use it as a flange at the edge. Our strip was 1 inch wide.
Fold in half lengthways with right sides out, and press. Cut and sew strips to each side of the runner, lining up the raw edges, and sewing with a scant (skinny) 1/4 inch seam.
Then bind as you would for a quilt. We did our binding by machine, and sewed it to the front first, then folded the binding to the back, pinning it from the front. We topstitched in the ditch from the front to catch the binding on the back and finish it neatly.
Arrange your EPP blocks as you like on your runner. We started with the largest block in the middle, then spaced the other blocks in order out from that in a line, working out to the smallest.
Pin well and either applique by hand, or you can machine topstitch as we did. You will find that you can fold under the ‘dog ears’ at the points of the jewels, and they will sit neatly behind each point and stay hidden.

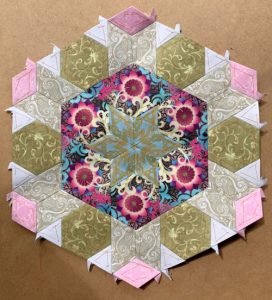
Below are a couple of other examples of EPP blocks, where we arranged the pieces to make a larger hexagon block, and we then fussy cut each colour to make blocks that look really intricate, and very effective.
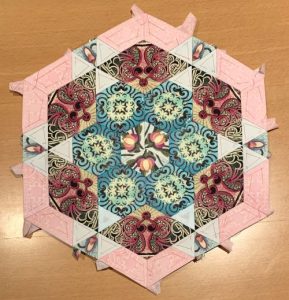
And that brings us to the end of this Mini Course on Fussy Cutting. I do hope you’ve enjoyed participating in this with us, and I hope you’ve learnt some new skills or brushed up on some old ones to help you keep creating the beautiful, and unique quilt projects that you love.
We’d LOVE to see some of your fussy cut projects, or hear your thoughts about this mini course, so please do leave a comment below for us.
If you’ve enjoyed these projects, we do have plenty more on the way in this year’s Quilter’s Christmas Advent Calendar. We have a bunch of Brand New projects (both Christmassy and not), and we’re thrilled to be able to feature several International Guest Designers, with new patterns to share with you as well.
You’ll find all the details of how you can get involved, when we launch this year’s Advent Calendar program TOMORROW (yay!), so keep an eye on your Inbox, and I’ll send you the details then.
Enjoy your day!


Thank you so much. This has been a great series and today’s post is just stunning.
Thanks Judy – I’m glad to hear you’ve enjoyed this series!
Lovely, lovely, work and presentation.
Thanks so much…
🙂 Thanks Anita! Glad you liked this project. I’ll be using mine this Christmas.