
Boxy Zippered Pouch Pattern
May 18, 2022
Hi!
Who doesn’t love a fabric pouch? And better yet, a quick and easy-to-make boxy zippered pouch tutorial, so you can whip one up in no time!! Our zippered pouch pattern shows you how to make a pouch that is the perfect size for a pencil case, or to hold some quilting tools, or even to take some hand work with you in your handbag.
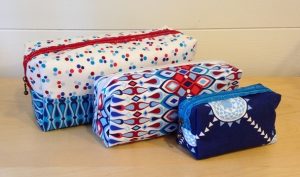
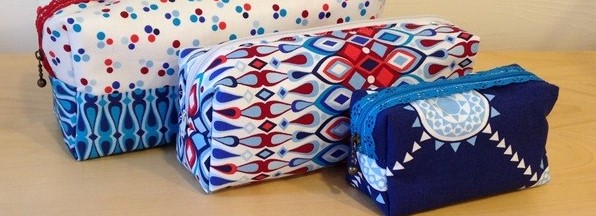
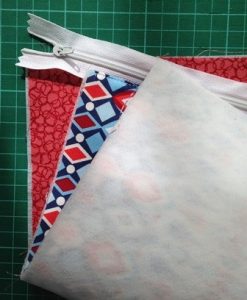
The pattern below is to make the middle pouch from this photo. As you can see from the others though, you can add different zips or piece some fabric to change these up as you like.
This pouch measures 8 inches long x 3 inches high x 2½ inches deep.
You Will Need:
* Small amounts of fabric for the pouch outer and lining – you will need a 12 inch square for the outer, and a 12 inch square for the lining.
* You will also need a 12 inch square of fusible pellon
* And two 12 inch squares of medium-weight fusible interfacing.
* You will need a zip that is 13-14 inches long.
Carefully cut the required bag pieces from the bag fabrics, interfacing and pellon as required. Fuse the interfacing on the wrong side of the two fabric squares, then fuse the pellon to the wrong side of the outer fabric panel.
(Note – you could quilt a 12 inch square first – with outer fabric, batting and a backing. You wouldn’t need any pellon then, and just one square of interfacing for the wrong side of the lining.)
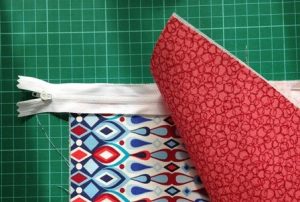
Lay the case outer face up on a flat surface. Lay the zipper face down on top, and the lining face down on top of that, so you have sandwiched the zip between the fabric layers.
Align the top edges and pin. Use your zipper foot to sew the zip in place.
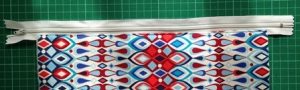
Open out the fabrics and fold them back as shown. Pin and topstitch along that seam to flatten it and secure the zipper in place.
Now sew in the second half of the zipper to the other ends of the case outer and lining.
Bring the outer up to meet the zipper, and fold the lining the other way to meet the other side of the zipper as shown.
Pin and sew.

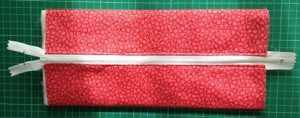
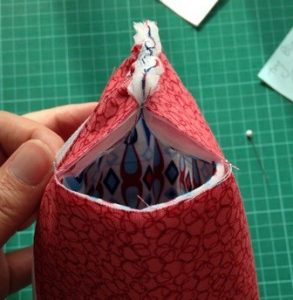
Turn the pouch through so the outer is on the inside, and the lining is on the outside of the tube.
Open the zip partly, and flatten on your flat surface, so that the zipper is centred down the middle of the case as pictured.
(You may choose to sew down each short edge first, but make sure the zipper pull is in the middle of the case.)
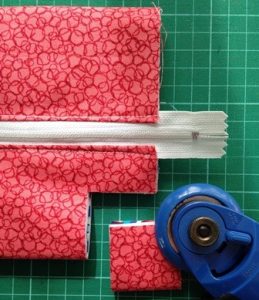
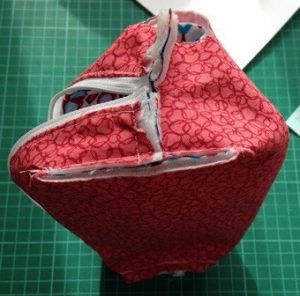
For this pouch, measure and cut away a 1½ inch square from each of the four corners.
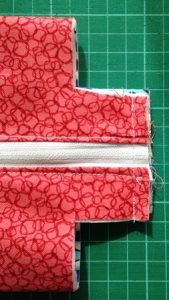
One side of the case, with both corners cut away, and the ends sewn together.
(You may like to bind these edges as you go, but this is optional. Cut a strip 1 1/4 inches wide and use as a single fold binding to cover these short edges first, then the boxed corners afterwards.)
Now open out the corners and fold together across the cut edge, so that the seam is centred, and the seam allowance points down, away from the zip.
Pin and sew across the corner to make the boxed edge for the side of the case.
Repeat for the remaining three corners.
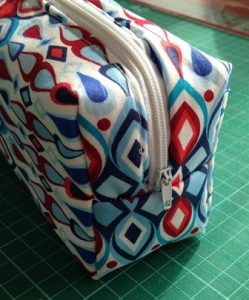
Turn the case right sides out, and you’re finished and ready to make the next one!
Aside from making this for yourself, these make great gifts – for quilty or non-quilty friends and family. Set aside a day and mass-produce a bunch, and you’ll have some great stocking stuffers ready for Christmas!
We hope you enjoyed our zippered pouch pattern, please share photos of your pouches when you’ve made them, in the comments below.
![]()
PS. If you like bags and new quilt patterns, remember to check out our Premium Online Quilt Magazine too, as there’s always new patterns in every monthly issue!
5 responses to “Boxy Zippered Pouch Pattern”
Leave a Reply

Welcome to our
Online Quilt Magazine Blog
Read through to discover hints and tips, articles from magazine contributors, sneak peeks and more!
Please enter your email address in the box below to receive notification of
new posts by email.
Thank you. Amazing how we can look at patchwork and just have ago🤗 but when it comes to zippers in bags🤪 it does my head in. This has to be the best explanation… so I’m going to have a go👏
Thanks Wendy! I’d love to see a photo when you’ve finished yours.
I just finished this Zippered Pouch! Love the pattern, very easy to follow. I doubled the pattern to make a bigger pouch and it came out perfect.
That’s great Mary! Please send me a photo – I’d love to see it!!!
Fantastic gift idea.