
How To Free Motion Quilt a BIG Quilt on a Small Machine
May 31, 2023
Hi!
This week we’re going back through the archives with a wonderful article quilter Leah Day wrote for our Online Quilt Magazine about how to free motion quilt a big quilt on a small domestic machine.
Even if you’re happily quilting on a regular sewing machine now, this is a great reminder of some hints and tips that you might find really useful, and a refresher never hurts!
As Leah says:
If you open most quilting magazines or check out the section of books in a quilt shop, what do you find? Usually hundreds of books or projects on quilt piecing or appliqué, but hardly any information about how to QUILT your quilts.
There’s a particularly limited amount of information on how to quilt your own quilts on your home sewing machine. And free motion quilting a big quilt on your small machine in that information is often seen as not easy to do.
Yet quilting your own quilts is not only possible, it can actually be easy! I truly believe that if your machine is good enough and big enough to piece your quilt top, it should be just fine for free motion quilting it too.
So here’s a guide to getting started quilting on your home sewing machine:
1. Start with your Machine Setup
How you set up your machine on your table is very important! It’s really essential to have your machine on a flush surface with the tabletop.
This way you have one solid surface for your quilt to rest on and you’ve also reduced the drag and friction of your quilt rubbing against the sides of your machine.
But how you set up your machine goes beyond putting it into a flatbed table. You should combine your sewing table with more folding tables so you have at least 3 ft to the back of your machine and 2 ft of table space to the side.
This allows you to quilt even HUGE king sized quilts on your machine because all the weight and bulk of your quilt will be evenly distributed over this large tabletop.
It also really helps to push your whole quilting table system into a corner so the left side and back are against walls. This way your quilt will never fall off the side.
2. Look to your Chair
What are you sitting on at your sewing machine? Is it the worst chair in the house?
Often we spend a lot on fabric, but skimp when it comes to the chair we stitch in. This is unfortunate because how you sit can have a profound effect on how you quilt. If your chair makes your back or knees hurt within 5 minutes, you’re not going to be able to sit in it long enough to quilt your whole quilt!
Instead of going to the office supply store and getting a standard office chair, instead look online for a doctor’s stool. These round, leather stools can easily be found for under $50 on Ebay.
Why do I love them so much? Because a doctor’s chair is actually designed to lift higher than a standard office chair, which will allow you to sit at a higher angle and get better control over your quilt!
The biggest thing you want to avoid while quilting is hunching over your sewing machine, and a taller chair will help you keep your back straight and your arms at right angles to your tabletop.
Both of these things combined: a flush, flatbed sewing table and a taller doctor’s stool will enable you to sit at your machine properly and enable you to quilt for longer periods and with less strain to your body.
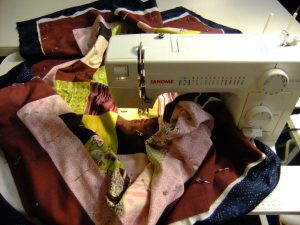
3. Don’t Roll Your Quilt
For years we’ve seen diagrams and heard the steps to rolling a quilt into a squishy log and inserting it into the machine before quilting. It’s really unfortunate that these directions have been passed around so much because it’s really a terrible way to try to quilt your quilt!
Instead of rolling your quilt into an unmovable log, instead just squish it into the machine arm. Squish and squish and squish until you reach the center of the quilt, then flatten the area you wish to quilt.
That flat area only needs to be about the size of your hands, so all the rest of the quilt can be bunched up in the arm of the machine, which makes it much easier to shift and move as you quilt each section.
4. Don’t Drop Those Teeth!
Again, another long taught lesson for free motion quilting has been to drop the feed dogs, or metal teeth, on the machine.
The reason for this was simple: with the feed dogs engaged the quilt was feeding forward, making it difficult for quilters to move and shift the quilt easily.
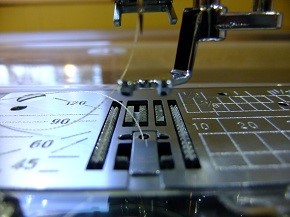
But here’s the real deal – dropping your feed dogs can actually mess with the tension of your machine. Many quilters try free motion, but immediately get scared away because the second they drop their feed dogs, their stitches get ugly!
So instead of dropping those metal teeth, instead cover them up. You can easily use an index card with a hole punched in the center for the needle to pass through, or even better you can get a Supreme Slider, which is a Teflon coated sheet that helps to make the surface of your machine very slippery.
The more slippery the surface of your machine bed, the less friction and drag you will be fighting as you quilt your quilt.
5. Start Simple
For your first free motion quilting project, it helps to pick a quilt top you don’t care much about.
While that might sound bad, the fact is starting with a project you have a huge emotional attachment to can be terrifying. It helps to start with a quilt top, or even plain fabric, that you don’t have either a lot of time or money invested in.
Keep in mind that no matter what you do, no matter what happens when you get that quilt under the needle and start quilting it – you can NEVER RUIN A QUILT!
Seam rippers were invented for a reason, so never fear that your quilt will be destroyed if you try to free motion quilt it. Just rip out the offending stitches and keep going!
6. One design is all it takes
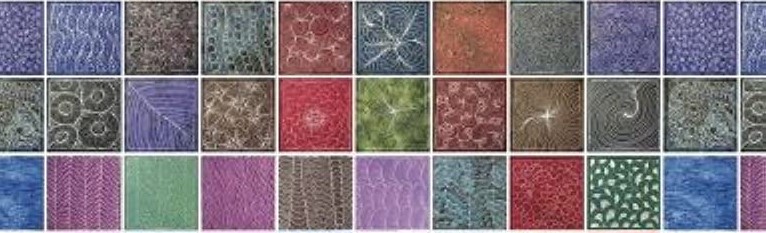
Even though there are hundreds of designs on the Free Motion Quilting Project right now, you really only need 1 single design to get started.
If you quilt just 1 design over the surface of your entire quilt, by the end you will have learned loads about moving your quilt in free motion, about the speed of your machine and the movement of your hands, and you will have memorized that design so completely you’ll likely be able to stitch it in your sleep!
This is the best possible way to learn how to free motion quilt: pick just one design to get started and stitch it over an entire queen sized quilt.
Here’s a very easy design for you to try:
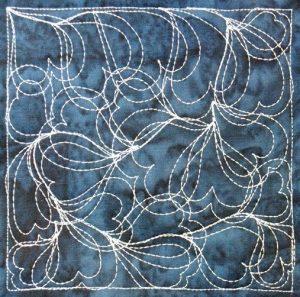
This is called Heart Confetti and it’s created by simply stitching heart shapes. Starting on the red dot (see below), you can trace this stitch by first following the red line to form the first heart. Pivot off that red dot again and stitch a second heart around the first following the blue line:

Next travel stitch along the last heart (orange line) and quilt another heart, overlapping the first set (purple line).
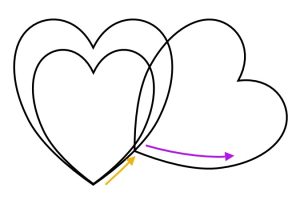
It’s really that easy – stitch hearts all over the place until your entire quilting space is filled up with beautiful quilting.
If you’re quilting a bed quilt that you want to be soft and comfortable, aim to stitch each heart as big as your hand. If you’d rather try out this free motion design on a smaller scale, stitch your hearts around the size of a quarter for a much denser effect.
So that’s it! Quilting your own quilts (even HUGE quilts) on your home machine is absolutely possible. All you need is a few modifications to your current sewing station and a willingness to jump in with both feet and try a new design.
I promise, by the time you finish your first full or queen sized quilt, you will feel 100% more confident in your ability to free motion quilt!
Let’s go quilt,
Leah Day
And we think this is a fantastic and easy to follow guide to how to quilt even a big quilt on your small home machine. As Leah says – just get started – get your set up right, then practice, and practice some more and you’ll be quilting like a pro in no time! 🙂
Do it today!

(About the Author: Leah Day is the author of the Free Motion Quilting Project, a blog project dedicated to creating new free motion quilting designs each week and sharing them all for FREE! Leah is also the author of From Daisy to Paisley – 50 Beginner Free Motion Quilting Designs, a spiral bound book featuring 50 designs from the project, and she now has three Free Motion Quilting classes available through Craftsy.com . https://leahday.com/ )
One response to “How To Free Motion Quilt a BIG Quilt on a Small Machine”
Leave a Reply

Welcome to our
Online Quilt Magazine Blog
Read through to discover hints and tips, articles from magazine contributors, sneak peeks and more!
Please enter your email address in the box below to receive notification of
new posts by email.
Not rolling the quilt is an excellent idea.