
Quick Quilted Bag – Our Tea Towel Tote
October 11, 2023
Hi!
I don’t know about you, but I think sometimes they have the cutest prints on tea towels, and it always seems a bit of a waste to just dry dishes with them. Why do that when you can turn them into a quick quilted bag instead, and then you’ll be using (and admiring) those prints for years!
Today, here’s our pattern for our Tea Towel Tote –
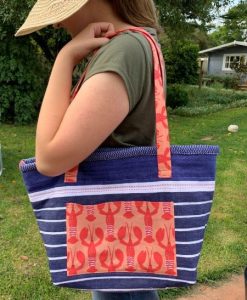
Tea Towel Tote
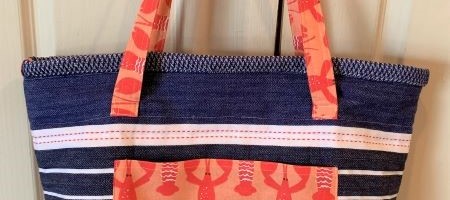
With just three tea towels, a couple of hours and some left-over batting, you can make this fun soft over-the-shoulder quick quilted bag really easily, and it’s a great gift idea too!
This tote measures approx. 7 x 12½ inches at the base and the top is approx. 18 inches wide.
You Will Need:
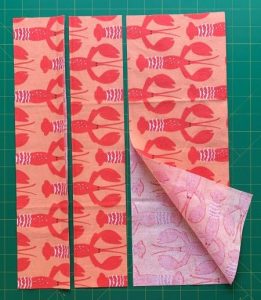
2 x jumbo tea towels – ours measured 60 x 90 cm (24 x 36 inches)
1 x smaller tea towel in fun contrast colours – ours was 16½ x 24½ inches
Piece of batting measuring at least 62 x 94 inches, plus a small amount for the handles.
Note – this pattern will be based on the measurements for ours, but it is flexible. Work with the size you have and make the adjustments as you need to.
Quilting:
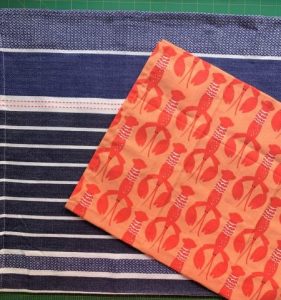
We had a pair of blue tea towels – a stripey one for the outside and a plainer blue for the inside.
We also found a great smaller tea towel with a fun lobster print for the contrast pocket, handles and binding.
If you don’t have tea towels, use fabric instead.

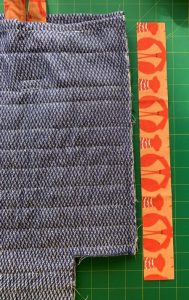
Fold the outer tea towel in half, and trim 2 inches off the top (of both halves whilst folded).
Also trim the sides to take off the hemmed edges of the tea towel.

We left the hemmed edges on the inner tea towel at this point.
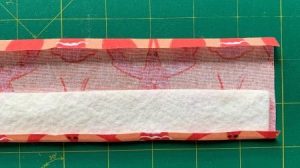
Layer to quilt. First the inner tea towel, with right side down, then the batting, and then your top tea towel, right sides up.
The edges will be close together, but pin and quilt as you like.
We quilted in simple straight lines, following the white lines on the tea towel.

A closer view of your layered tea towels.
When you have finished quilting, trim to square up the SIDES.
Trim any excess batting at the top and bottom, but make sure to leave top and bottom tea towel edges un-trimmed.
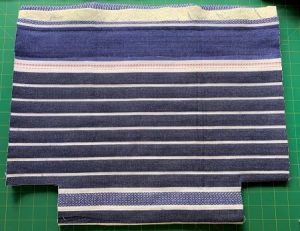
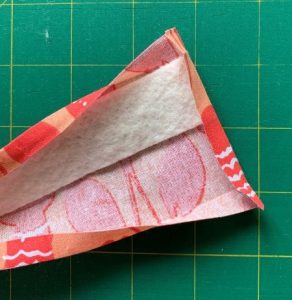
When quilted, re-fold the quilted panel in half with the fold to the bottom edge and the top edges of the outer tea towel lined up evenly.
Measure across 3 ½ inches from the side edge and measure down 3 inches and cut away, to box your bag base.
Repeat for the other side.
This gives a bag base about 6 – 7 inches wide. If you want smaller, then adjust the size of this cut out corner, making sure the measurement in from the side edge is a ½ inch longer then the down measurement.
Handles:
Trim off the hemmed edges of your small tea towel, trying to leave as much fabric as you can.
Fold in half, and cut two strips 3 inches wide off the top edge, across the width of the tea towel.
This will give you 4 strips.
Put the remainder aside for now.

Join the strips in pairs end to end and press. Ours ended up at about 31 inches long.
Fold up and press a ¼ inch seam allowance down each long side too.
From your extra batting, cut two strips 1 inch wide and place 1 in each handle as pictured, tucked under the folded up seam allowance.
Fold over a ¼ inch seam allowance on the ends, then fold in half to enclose the batting and pin.
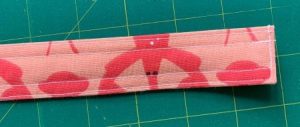
Topstitch around all four sides.
We also topstitched a second row of stitching down each long side, a ¼ inch in from the edge.
Make two handles.
Assembly:

From the left over small tea towel fabric, cut a pocket for the front of your quick quilted bag.
We cut ours 10 x 7½ inches, but you need to make sure you have at least 3 inches of fabric left over on one side and one long edge, as you need this for binding in a minute.
Fold over a ¼ inch seam allowance twice at the top of the patch pocket and topstitch to hem that edge.
Position the pocket so it is centred and about an inch up from the cut lines for the base. Pin and topstitch through the front layers only, going down the sides and across the bottom, to make an easy patch pocket.
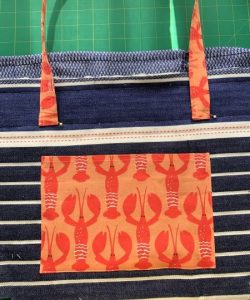
Now add the handles.
We positioned our handles so they were about 2 inches up from the top edge of the pocket, and so that the sides of the handles were aligned with the side edges of the pocket.
Pin and topstitch in place, sewing a small rectangle at each end to secure.

Repeat to add the second handle on the other side.
Use the first one as a guide to positioning the second one.
Binding:
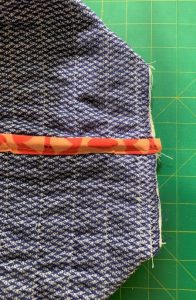
Re-fold your bag in half, with right sides together and pin and sew the side seams together with a ¼ inch seam.
As this bag is not lined, we added binding to these seams to keep them neat.
From your leftover small tea towel fabric, cut two strips slightly longer than your side seams x 1½ inches wide.
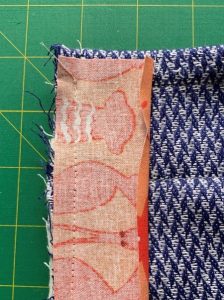
Fold up and press a ¼ inch seam allowance on one side.
Line up the other side with the edge and sew a ¼ inch seam to join it.
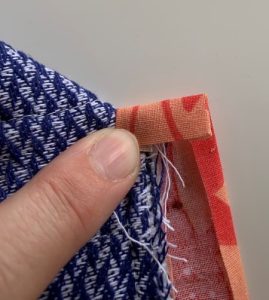
Your binding strip should sit at the top of the bag top or just above it. (Ours pictured was a little low.)
Fold the binding over the seam and pin and topstitch closed.
Trim the bottom edge of the binding so it is level with the bag, and repeat for the other side.
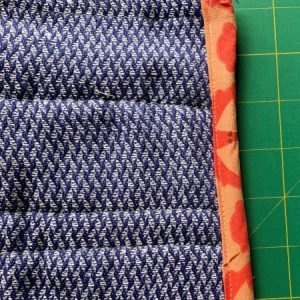
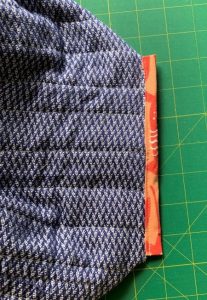
Now form your base.
Fold the side seam over the base edge as shown, and sew together.
The bound edge adds some bulk, but sew slowly and you will be fine.
Repeat for the other side.

Cut another two strips from the small tea towel fabric 1½ inches wide x 1 inch longer than your base seam.
Fold over one edge and sew the other to the base seam, as you did for the sides.
Fold up the ends to enclose the seam, then fold in half and topstitch again to secure.
Your finished bound base seam.

Turn the bag right sides out.
The top of the inner tea towel is rolled down to bind the top edge of the bag.
Fold down the inner top edge twice so it sits over the edge of the outer tea towel.
Your binding will come over at the sides too as shown. Pin and topstitch to secure. (Ours was a bit too thick at the side seams to sew through with our machine, so we went as close as we could, and finished it with a few hand stitches to hold the bound edge down neatly too.)
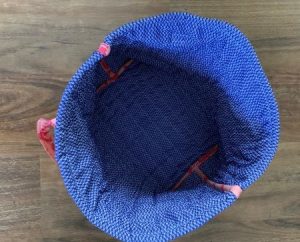
The inside of your Tea Towel Tote, with plenty of space.
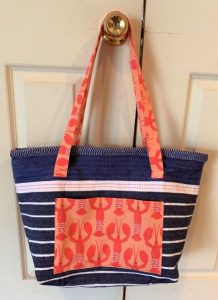
And the outside – your quick quilted bag ready to go!
And that’s it! So get hunting now for those cute tea towels that you can turn into quick quilted bags (and they make great presents too!!)
Enjoy!


Welcome to our
Online Quilt Magazine Blog
Read through to discover hints and tips, articles from magazine contributors, sneak peeks and more!
Please enter your email address in the box below to receive notification of
new posts by email.
Leave a Reply