
Exploring Blocks Sampler Quilt – Month 5
November 29, 2023
Hi!
I’m not sure how we got to the end of November this quickly, but it’s here now, and that means it’s time for your next Block of the Month block in our Exploring Blocks Sampler Quilt!
Our block this month is the Twelve Triangles Block. This block is a patchwork classic, but you’re going to love what you can do with it when you start playing around…
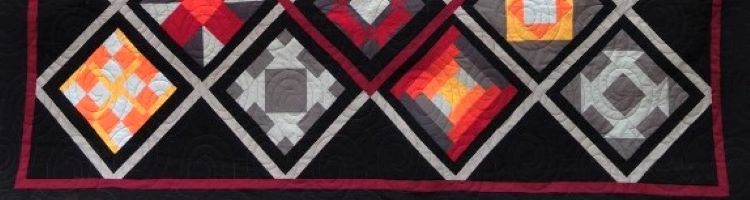
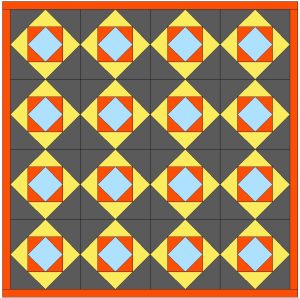
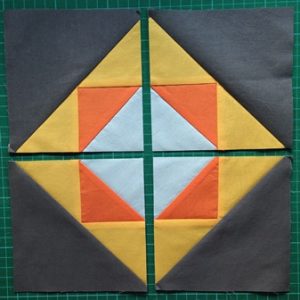
Here’s what we’re working towards:
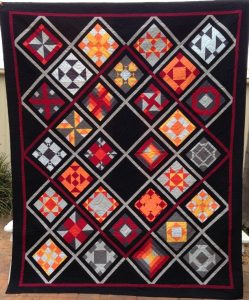
We will be making blocks for 9 months in total, and then putting them together into this quilt in the tenth month.
Rather than repeating the fabric requirements each month, refer back to the patterns in Months 1 or 2 (previous blog posts) for the fabrics that you’ll need.
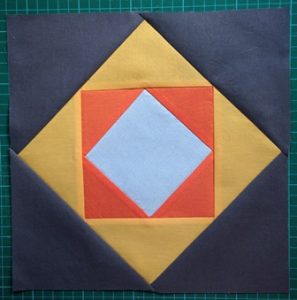
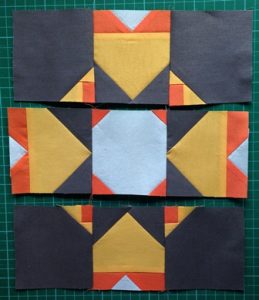
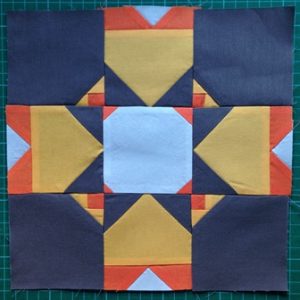
Block 5 – Twelve Triangles Block
You Will Need:
Four (4) fabrics that contrast. We used pewter, yellow, orange and pale blue.
* You will need to make THREE (3) of these 10 inch Twelve Triangles blocks. Refer to the rotary cutting guide below for cutting directions and quantites for EACH block.
Cut:

Assembly:
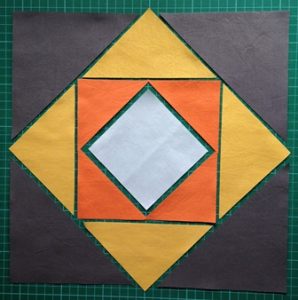
Lay out each block as shown.

Start by joining opposite orange triangles to the centre square.
Press seams.

Now join the remaining two orange triangles and press well.
Trim off the ‘dog ears’ at the seams.
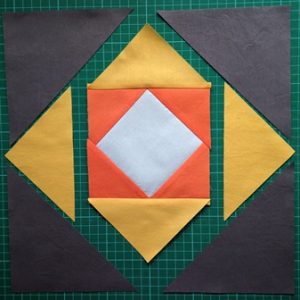
Continue adding triangles. Next is the opposite yellow pair.
And then add the remaining yellow pair of triangles.
Press well and trim dog ears.
Add two opposing pewter triangles.
And to finish, add the remaining pewter triangles and press well.
This is a nice block to repeat, and would be a good one to show off a larger scale print fabric in the centre square, or separate out on point with a matching background block, for a more modern style layout.

4-Patch:
And now let’s play! This block can also be cut into a 4-patch block, the units rotated, and re-pieced, for a completely different block.
We’re going to try a couple of different variations on this theme, this month.
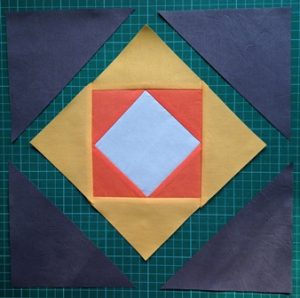
Cut one of your Twelve triangles blocks into 4, as shown.
As your finished block should measure 10½ inches square, you should be able to cut in half vertically once at 5¼ inches, and do the same horizontally.
However – if your block is slightly out, don’t worry – make the cuts so they run straight through the centre square and through the points of the centre diamond as shown.

Rotate each quarter 180 degrees to make a pinwheel style block, as shown.
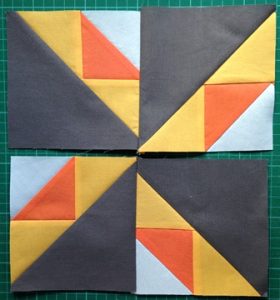
Join the units into pairs and press seams so they face in opposite directions.

Join the pairs together to re-complete your block.
Also – as you have cut and re-pieced your 10½ inch block, the finished block will now be about a ½ inch smaller all round.
This is fine, and we will take it into account when we put the quilt together.
9-patch:
And don’t stop there! Now let’s try a 9-patch as well!!

This is an even 9-patch.
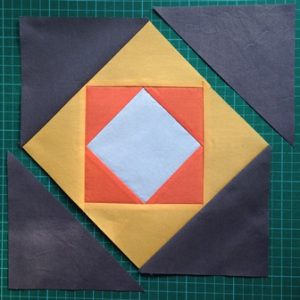
Measure to check (and square up your block if you need to first), and cut twice vertically and twice horizontally to cut your block into 9 even sized squares.
For a 10½ inch block, you need to cut at 3½ and 7 inches across, both horizontally and vertically.
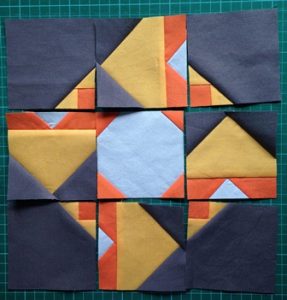
You have a couple of options with rotating the pieces for different effects.
Try moving the yellow point blocks a quarter turn to the left.
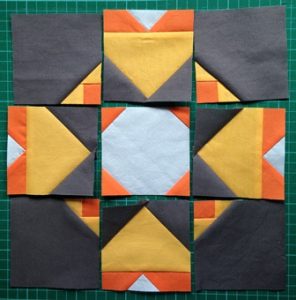
Or, rotate the middle blocks 180 degrees as we did.
Carefully piece the units together into rows.
Press so the seams alternate directions between the rows.
Finally join the rows together to reveal your new re-pieced 9-patch Twelve Triangles Block, with a new star revealed in the centre.
As before, this finished block will be smaller than your original block (approx. an inch), but we will take care of that when we assemble the quilt top at the end of this project.
I hope you enjoy making this block this month, and keep an eye out for our Exploring Blocks Sampler Block 6 at the end of December!
Enjoy your week!

2 responses to “Exploring Blocks Sampler Quilt – Month 5”
Leave a Reply

Welcome to our
Online Quilt Magazine Blog
Read through to discover hints and tips, articles from magazine contributors, sneak peeks and more!
Please enter your email address in the box below to receive notification of
new posts by email.
It looks to me like you turned the yellow point blocks to the right, not left, in the picture above.
Hi! Thanks for your comment. I think I meant turn them to the left, after they’d already been rotated one quarter turn in the picture above. Either way, play around with the pieces and see what you can come up with!
Thanks, Jody