
Exploring Blocks Sampler Quilt – Month 9
March 27, 2024
Hi!
It’s time for the last set of blocks in our Exploring Blocks Sampler Quilt, and we’ll be finishing with 4 blocks based on the Calico Puzzle block this month.
So without further ado, it’s time to play!
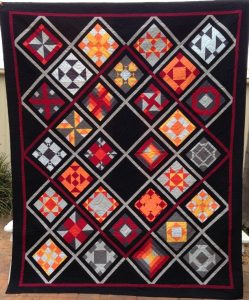
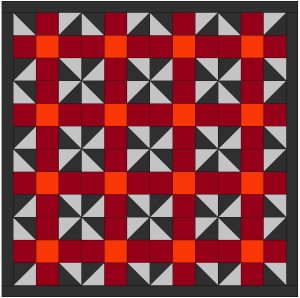
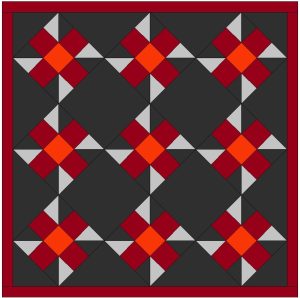
This is the quilt we’re working on, and if you’re new to this, it’s not too late at all – scroll back through our previous posts to find the rest of the blocks, and you’ll find the fabric requirements listed with Months 1 and 2.
Before we go any further, I do need to address a concern that was raised about this quilt previously too. It has been pointed out to me that one of the re-pieced blocks from this month looks very like a swastika symbol. I do apologise for any concerns this may raise, but I would like to make it very clear that in no way would I ever include a swastika symbol in any of my quilts, and I certainly mean no offence to anyone by it.
This block was only included as it is more of a windmill style block – I believe the nazi symbol is reversed, and I took this version to be more of the traditional meaning of this symbol as divinity and spirituality.
If you would prefer to leave this block out of your sampler quilt, feel free to make two of another of our blocks along the way, or make two of these other blocks from this month’s instructions and simply replace it in the quilt when we come to the assembly stage next month.
Block 9 – Calico Puzzle Block
You Will Need:
Four (4) fabrics that contrast. We used maroon, red, charcoal and silver.
* You will need to make FOUR (4) of these 10 inch Calico Puzzle blocks. Refer to the rotary cutting guide below for cutting directions and quantites for EACH block.
Cut:
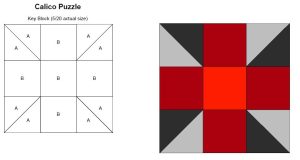
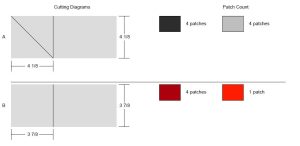
The measurements for unit A are 4 1/8 x 4 1/8 inches. You will need to cut a total of 8 charcoal, and 8 silver squares.
The measurements for unit B are 3 7/8 x 3 7/8 inches. You will need to cut a total of 16 maroon squares, and a total of 4 red squares.
Assembly:

To start, make the half square triangle units for the corners of the block.
Mark a diagonal line on the wrong side of two of your silver A squares.
Pair the silver squares up with matching A charcoal squares, with right sides together.
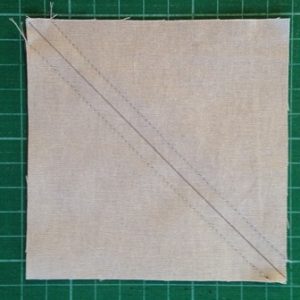
Sew a ¼ inch either side of the marked line, then cut on the line.


Open out and press, so that your two pairs of squares give you four half square triangles.
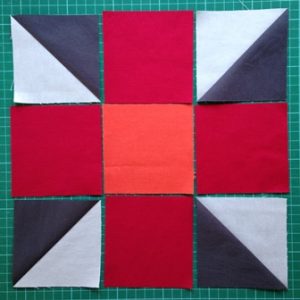
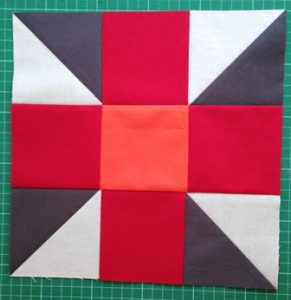
Lay out your block as pictured.

Join the square units together in three rows of three.
Press the seams inwards for top and bottom rows, and outward for the middle row.
To finish, sew the rows together and press well.
Make four of these blocks in total.
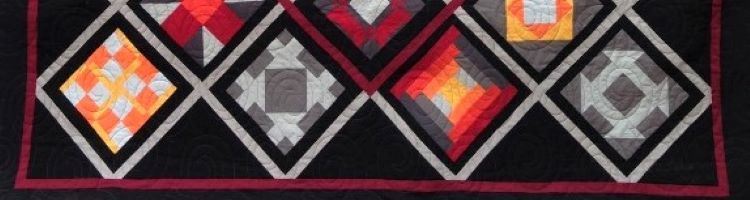
You get a great pinwheel secondary pattern when the blocks are laid out in a regular grid, or try on point for a windmill or flower like design.
4-Patch:
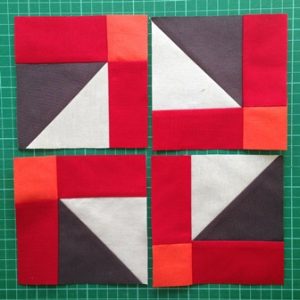
And now let’s play! This block can also be cut into 4-patch blocks, the units rotated, and re-pieced, for a completely different block.
We are going to make two 4-patch variations with this block.

Cut one of your blocks into 4, as shown.
As your finished block should measure 10½ inches square, you should be able to cut in half vertically once at 5¼ inches, and do the same horizontally.
However – if your block is slightly out, don’t worry – it is more important to cut evenly through the middle of the centre square, as shown.
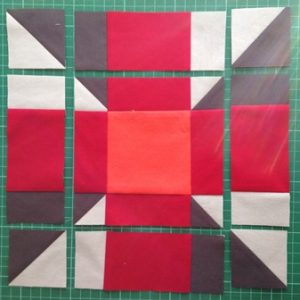
Rotate the quarters through 180 degrees, so the red centre square is in each outer corner.
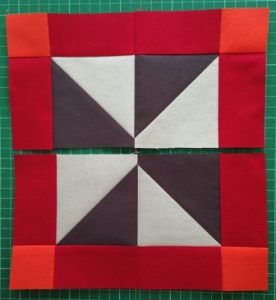
Sew into pairs, and press seams in opposite directions.

Join the pairs together to finish your first 4-patch variation.

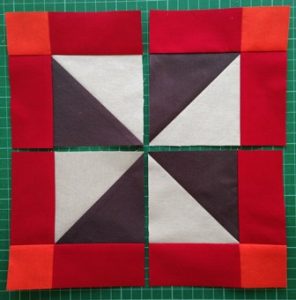
Cut another of your blocks into quarters, exactly as you did for the previous block.
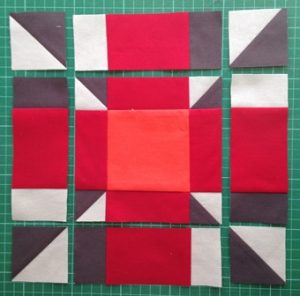
Rotate the quarters as pictured.

Sew into pairs and press seams in opposite directions.
(If you choose to, at this point you could move the top pairs to sit below the bottom pairs and this would give a different finished block, a bit like a figure 8.)

Finally join the pairs together to complete your second 4-patch block variation.
9-patch:
And don’t stop there! Now let’s try a 9-patch as well!!
This is an UNEVEN 9-patch.
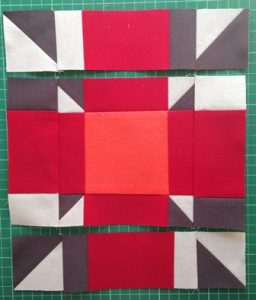
Square up your final block first, then cut 1¼ inches away from the centre orange square, as pictured.
Cut horizontally, and vertically to divide your block into 9.
Turn each of the side middle strips end for end as pictured.
Sew the units into rows.
Press seams well, and in opposing directions between the rows.

Finally join the rows together to reveal your new re-pieced 9-patch Calico Puzzle Block.
As before, this finished block will be smaller than your original block (approx. an inch), but we will take care of that when we assemble the quilt top at the end of this project.
And that’s it! Press your four blocks well, and keep checking for our final post towards the end of next month, when we will assemble and finish our new Exploring Blocks Sampler Quilt!
Enjoy!

4 responses to “Exploring Blocks Sampler Quilt – Month 9”
Leave a Reply

Welcome to our
Online Quilt Magazine Blog
Read through to discover hints and tips, articles from magazine contributors, sneak peeks and more!
Please enter your email address in the box below to receive notification of
new posts by email.
Wonderful explanation. Appreciate
Thank you very much for posting this pattern
Hi,
I’m working on the sampler quilt and I’m missing block 6. I’ve looked everywhere and I have everyone so far except block 6 and it’s components. Can you please send it to me so I can complete the project.
Thank you so much.
Hi Patsy! You’ll find block 6 here – https://blog.onlinequiltmagazine.com/2023/12/27/exploring-blocks-sampler-quilt-month-6/
It’s all here on the blog, but you’ll have to scroll back a few months to find it.
Looking forward to seeing your finished quilt!